How to Transfer Music from iPhone to Computer Effectively? (4 Tips)

More and more people get used to listening to music on the iPhone. But for safety's sake, you may want to transfer your favorite music from iPhone to computer for the backup. For example, when you prepare to switch to a new phone like iPhone 12, no one would like to have your data containing music lost by accident. There exists such a chance! Unlike Android users who are able to transfer their phone data to the computer via USB directly, for iPhone users however, it is usually a hard problem to transfer music from iPhone to computer. Luckily, there are various ways available online to solve it. Finish this article, and you will get 4 different methods to transfer music from iPhone to your computer.
Method 1: How to Transfer Music from iPhone to Computer Effectively (The Easiest Way)
1.1 How to Get All Music from iPhone to Computer with 1 Click
1.2 How to Move Music from iPhone to Computer Selectively
1.3 Video Tutorial on How to Transfer Music from iPhone to Computer
Method 2: How to Transfer Music from iPhone to PC with iTunes
Method 3: How to Copy Music from iPhone to Computer with iCloud
Method 4: How to Put Music on iPhone from Computer with Google Play Music Manager
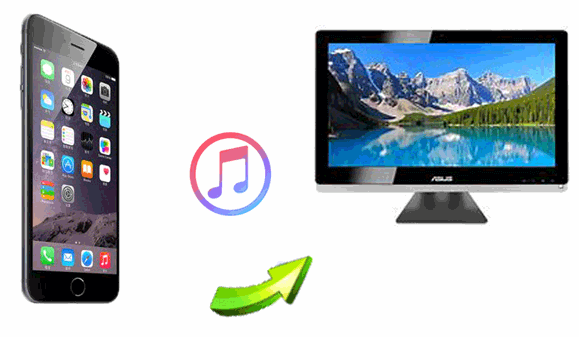
How to get music from iPhone to computer? When it comes to the easiest way to transfer music from iPhone to the computer, I'd like to highly recommend Coolmuster iOS Assistant to you, which also helps you to transfer music from iPhone to computer without iTunes. It has a clean and simple interface. But if you think its functions are like its appearance, then you are definitely wrong. Coolmuster iOS Assistant is a professional third-party tool aiming at helping transfer all the files between iDevice and computer. It is widely compatible with all generations of iPhone, iPad and iPod, like iPhone 12/11/XS Max/XR, iPad Air, iPad 2/1, iPad mini, iPod touch/Shuffle/Classic and etc.
You are free to choose which files you'd like to transfer between iDevice and computer, or you can choose to transfer them all with 1 click. The files it supports to transfer include contacts, messages, photos, videos, music, notes, bookmarks, books, calendars, apps and many more. The transfer process only contains several steps, so it is very convenient to use.
If you are wondering how to sync music from iPhone to the computer, just download it and have a try.
Now, are you curious about how to transfer your music from iPhone to the computer wholly or selectively with this tool? Here is the step-by-step tutorial.
Step 1: Launch the program on your computer.
After downloading and installing the software, run it on your computer. You will see the primary interface as below.
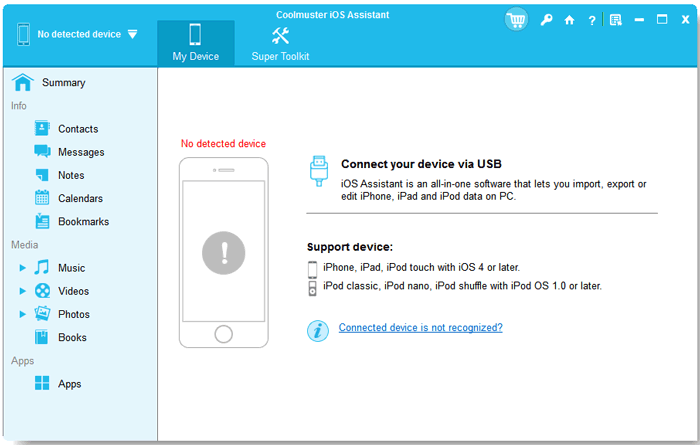
Step 2: Connect your device to the computer.
Connect your iPhone to the computer via a USB cord as it requires. The software will automatically start to detect your iPhone right away. Once your iPhone and your computer are successfully connected, you will see the interface as below.

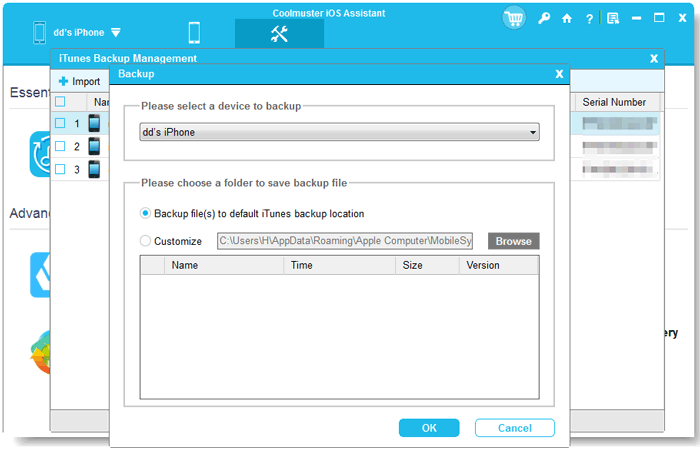
Step 3: Download music from iPhone to computer with 1 click.
Switch to "Super Toolkit" section. Click "iTunes Backup & Restore" button on the interface. Then from the drop-down menu, choose "Backup" and select your iPhone for backup. Choose the location to store your music. Then click "OK" button, and all your music files will be transferred from iPhone to the computer immediately.
How do I transfer music from iPhone to computer selectively? For selectively transferring music from iPhone to the computer, and continue with the following step.
Step 1: Connect iPhone to computer with a USB cable.
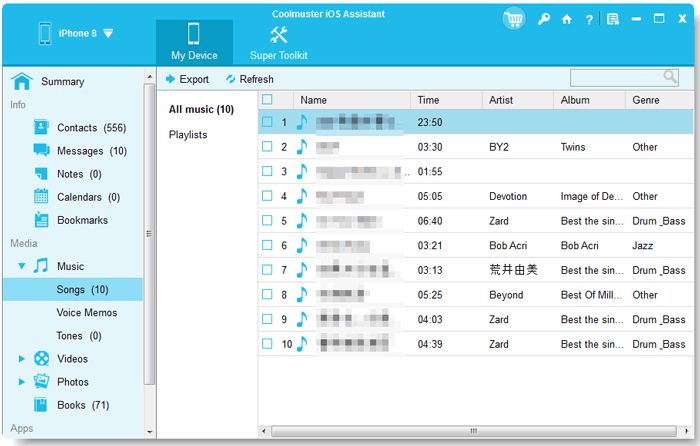
Follow the same Step 1 and Step 2 in 1.1 to connect your iPhone to computer. Once your iPhone and your computer are successfully connected, you will see the interface as below.

Step 2: Choose music files that you want to transfer.
Enter the "Music" folder in the left panel, and select which files you'd like to transfer from iPhone to the computer. After the selection, click the "Export" button, and your music will be imported from your iPhone to the computer automatically.
Please watch the video tutorial to learn more details on how to transfer music from iPhone to computer with Coolmuster iOS Assistant.
You May Also Like:
Top 4 Easy Ways to Transfer Music from iPhone to Android
A Complete Guide on How to Back Up Music on iPhone
How to Recover Photos from Locked iPhone 13/12/11 without Any Hassle
Using iTunes is a common and officially way to transfer your data between your iPhone and the computer. I dare to say that if you have tried Coolmuster iOS Assistant, you don't need this iTunes method anymore. iTunes has many limits when you need to import music from iPhone to computer. It only allows you to transfer purchased songs and you have to transfer them manually, which is very unfriendly to users. However, it doesn't bring you harm to know how it works. After all, it can be regarded as a method to transfer your music from iPhone to your computer when you don't have other alternatives.
Now let's see how to transfer music from iPhone to the computer with iTunes.
Step 1: Launch the latest iTunes on your computer and log in with your Apple ID.
Step 2: Connect your iPhone to the computer with a USB cable.
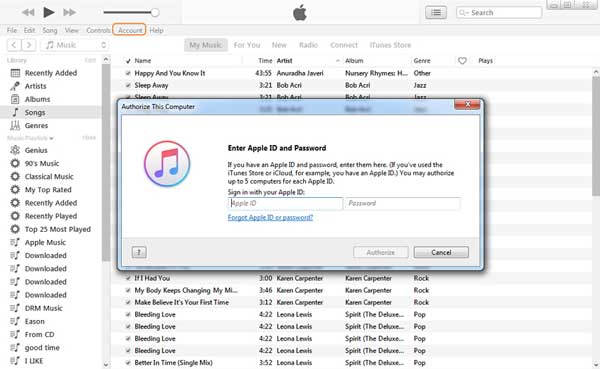
Step 3: Click "Store" and choose "Authorize This Computer".
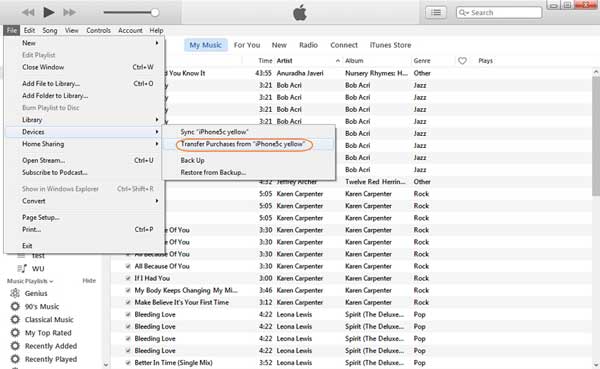
Step 4: Click "Files" > "Devices" > "Transfer Purchases from iPhone" to copy your music from iPhone to iTunes.
Step 5: At the left side of iTunes, click "Recently Added".
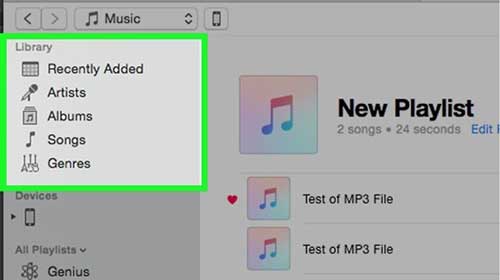
Step 6: Choose the purchased music you want to transfer, and click the "Download" button to transfer it from iTunes to your computer.
Tips:
Wondering how to transfer music from computer to iPhone without iTunes? Learn the top 6 ways to make it.
This post will teach you to fast get out of the DFU mode on your iOS device.
How to Change Your Location on Snapchat Map on iPhone and Android without Hassle?
This method is also easy to transfer songs from iPhone to computer, and it's more reliable compared with Method 2. Using iCloud, all your music in your iPhone including albums and playlist will be synced to your iTunes. However its download process is quite slow, and if you turn off the iCloud media library, all the songs you've downloaded will be deleted.
Here is the guide to copy music from iPhone to computer with iCloud.
Step 1: On your iPhone, go to "Settings" > "Music", and toggle on the "iCloud Music Library".
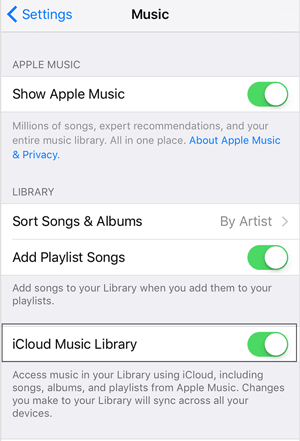
Step 2: A pop-up window will let you choose either to keep the music of your iPhone or to select "Delete & Replace". Choose former, then all your iPhone music will be added to iCloud Music Library; while you choose latter, then all your iPhone music will be replaced with the content of iCloud Music Library.
Step 3: On your computer, turn on the "iCloud Music Library". On Windows computer, you may find it on iTunes, click "Edit" > "Preference". On Mac, similarly, click "iTunes" > "Preference".
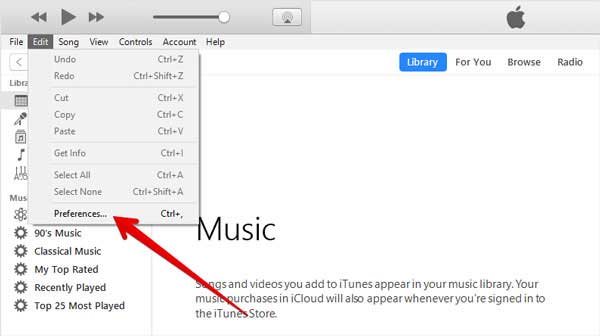
Step 4: Click on "General" option, turn on "iCloud Music Library" > "OK".
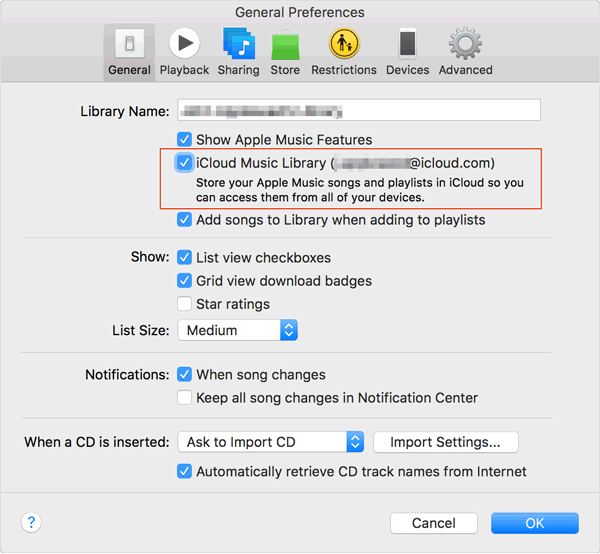
Then your music will be automatically transferred from your iPhone to the iTunes. You can click on the cloud icon to get the music from your iPhone to your computer. So that's how to move songs from iPhone to computer using iCloud.
Note: Make sure your iPhone is connected to Wi-Fi.
Maybe some of you would also like to know how to put music on iPhone from computer, and to achieve that, Google Play Music Manager is a good assistant. When you add new music to your music folder, no matter by downloading or by purchasing, Google Play Music Manager will automatically upload it to your Google Play Music account. You can access it in the Google Play Music app on all your devices.
Let's see how to use it to put music on your iPhone from the computer.
Step 1: Download and install the Google Play Music Manager.
Step 2: Open it and sign in with your Google account.
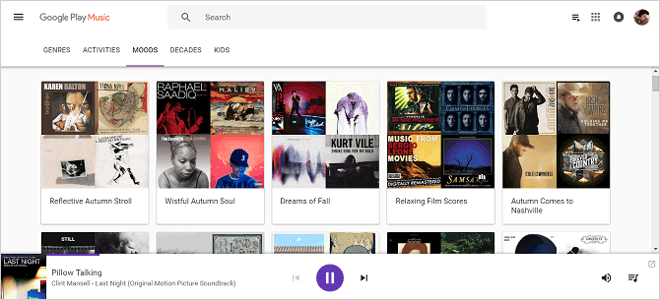
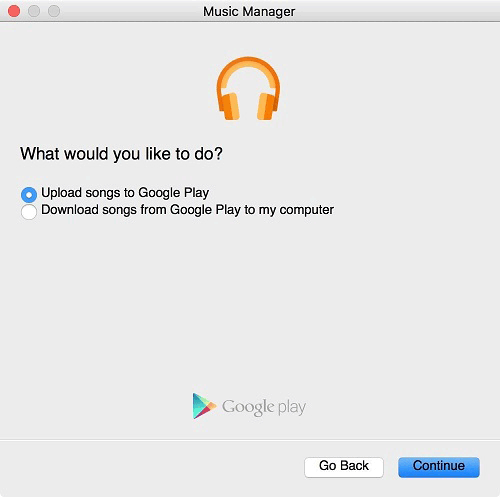
Step 3: Choose "Upload songs to Google Play", and click "Continue".
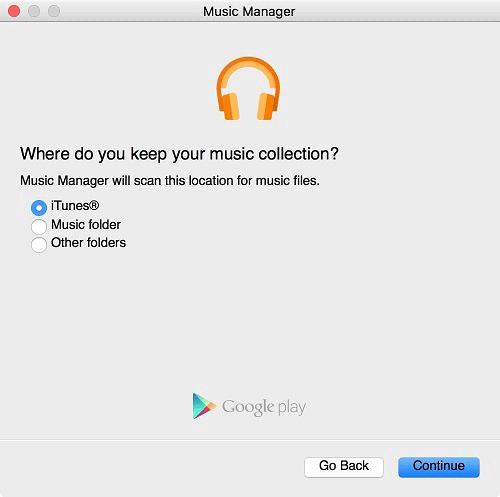
Now, please select a folder to upload your music.
Step 4: Install and run the Google Play Music app on your iPhone. Sign in with the same Google account.
Step 5: Then you can download the music to your iPhone. That's how to transfer songs from iPhone to computer with Google Play Music app. It is a little bit complicated.
Music is important to us, so when people back up files they will pay particular attention to it. Now you've known 3 ways to copy songs from iPhone to computer and 1 extra tip for the reverse. These methods are listed according to their importance, so you can see now using the Coolmuster iOS Assistant is the best method. If you want to transfer music from iPhone to your computer for the backup, please don't hesitate to try these methods. All of them can help you indeed. Your comments are welcome.
Related Articles:
How to Transfer MP4 to iPhone in a Simple and Quick Way?
How to Transfer Music from Computer to iPod [Fast Transfer]
[3 Ways] How to Transfer Books from iPhone to Computer
How Can I Transfer Files from PC to iPhone without iTunes? [5 Ways]
