Coolmuster Mobile Transfer Online Help
Coolmuster Mobile Transfer enables you to freely transfer files between any two phones. With it, you can selectively transfer almost all important files, such as contacts, text messages, call logs, photos, videos, music, documents, apps and more from phone to phone.
Below is the step-by-step process to use Coolmuster Mobile Transfer.
Part 1. Make Your Devices Recognized by the Program
Part 2. Transfer
Data from Phone to Phone
Part 1. Make Your Devices Recognized by the Program
When you launch the program, you might see the toolbox as below. Please enter "Mobile Transfer" module to continue.
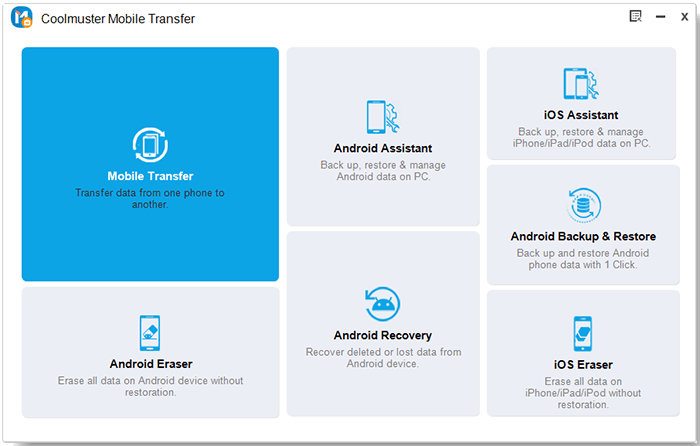
Now you might see the primary interface of Coolmuster Mobile Transfer.
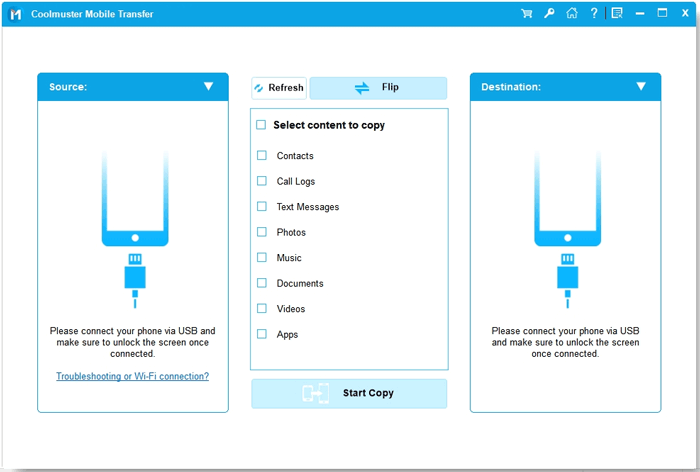
Before dealing with your device data using Coolmuster Mobile Transfer, please have your device connected to the program at first.
- Connect Android to Computer via USB Cable
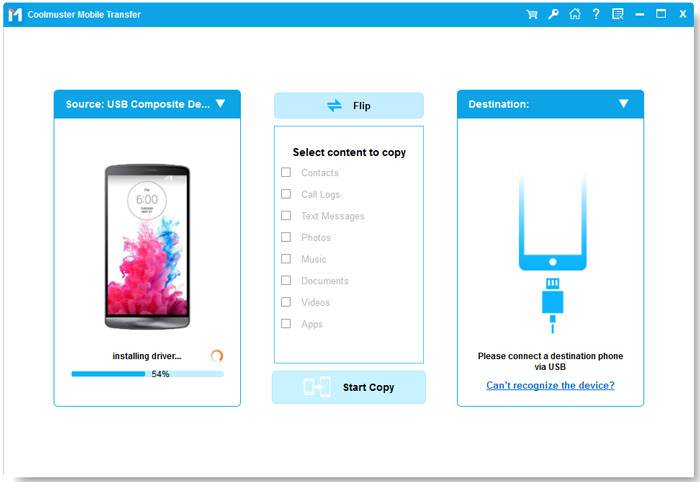
(1) Launch the program and make sure your Android phone has been connected to computer properly with a USB cable. Then the program might start to initialize your device and install driver for your device automatically.
(2) Enable USB debugging on your Android device with the onscreen prompts. Please refer to the corresponding instructions according to your Android OS version.
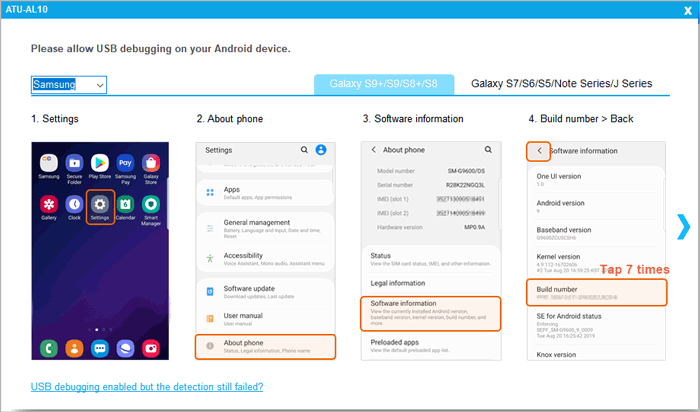
Note: For Android 4.2 or above, the program might remind you to authorize your computer to access your device data by tapping "OK" or "ALLOW" on your device. If you can't see this popup, please click "Show Again" option on the program or manually choose MTP option on your Android device.
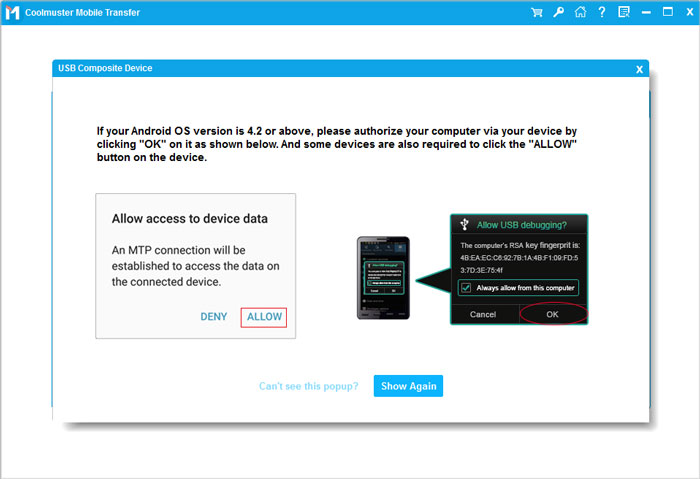
(3) The Coolmuster Android Assistant (Android Version) will be installed automatically on your device to establish the connection. If prompted, please authorize all listed permissions on your phone and tap "Confirm" button to ensure successful data transfer. If not, please click "OK" to move on.
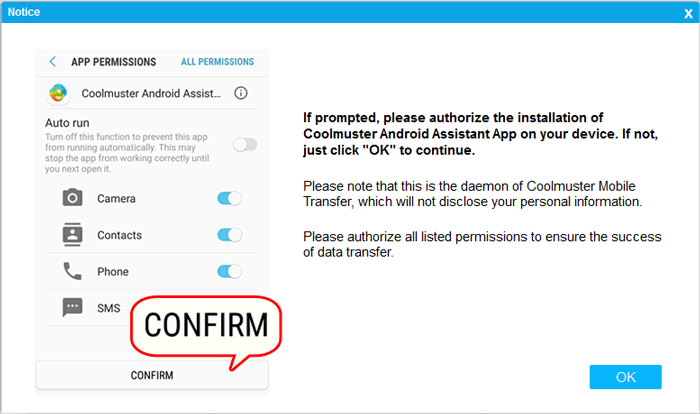
After that, the program might start to successfully connect your Android device and show "Connected" notification under your device.
- Connect Android to Computer via Wi-Fi
(1) Please click "Can't recognize the device?" option on the program, then a pop-up window will show up as below. Simply choose "Connect via WiFi" option to move on.
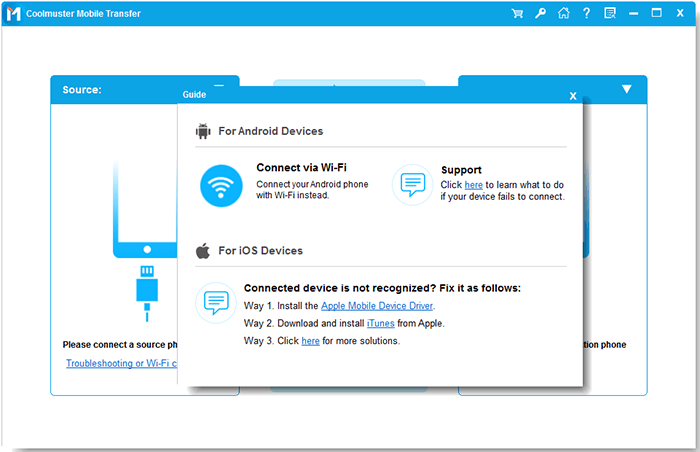
Note: Please make sure your Android phone and desktop computer has connected to the same network. For example, if the IP of your phone is 192.168.1.X, your PC's IP should be 192.168.1.X, too.
(2) Download and install Coolmuster Android Assistant (Android Version) on your Android device by visiting https://www.coolmuster.com/android-assistant-apk.html via browser. Then launch the App on your Android device, and run the PC version of the program on computer at the same time.
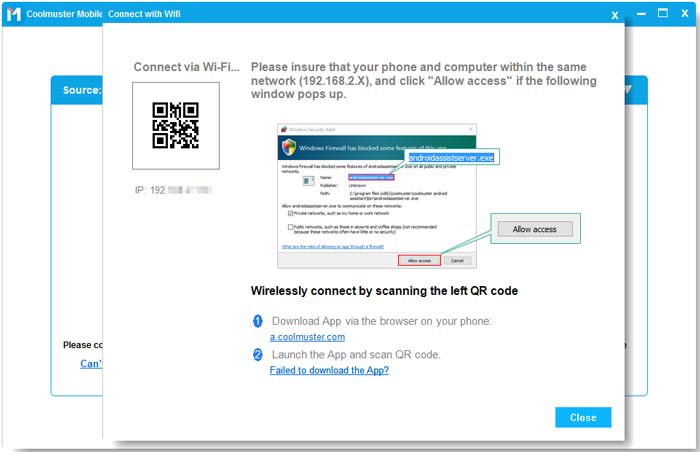
(3) If it prompts, please click "Allow access" option on computer. Then scan the QR code on the program with the the app to have the program detect your Android phone. When it is connected successfully, you might see the "Connected" notification under your Android device.
Still have problems? Please learn what to do if the program does not recognize your Android device.
- Connect iDevice to Computer via USB Cable
(1) Launch the program on PC and connect iDevice to computer with a USB cable.
(2) Unlock your iDevice with your password to have your iDevice detected by the program.
(3) Then your iDevice will receive a notification, asking you whether to "Trust This Computer". Just tap "Trust" option and confirm it with your password if you allow this computer to access your settings and data on your iDevice when connected.
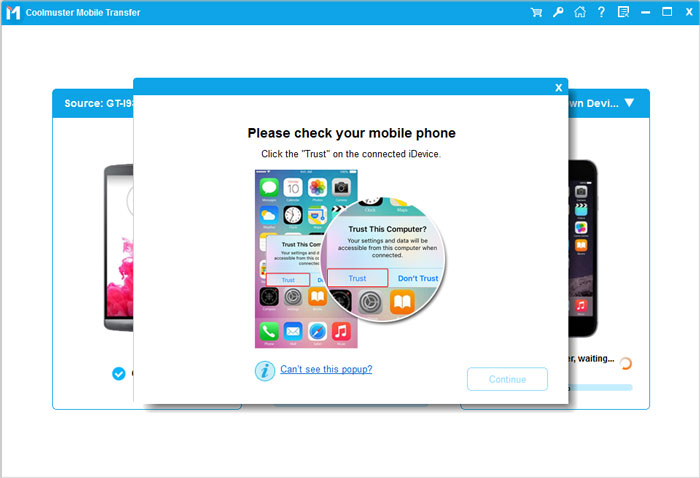
Then the program will automatically recognize your iDevice and show "Connected" notification under your iDevice.
Still have problems? Please learn what to do if your iDevice fails to connect.
Part 2. Transfer Data from Phone to Phone
Notes:
a. Before transferring, please make sure the Source device and Destination device are in the correct side. If not, please click "Flip" button to change the position.
b. The "Clear data before copying" option currently only supports Android devices.
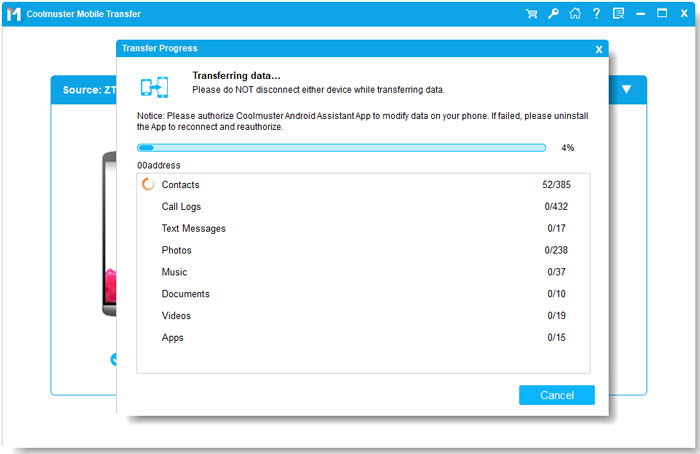
c. Please do NOT disconnect either device until the whole transferring process is complete.
1. Transfer from Android to Android
(1) When two Android devices have been successfully connected to the program with above methods, you might get an interface as below.
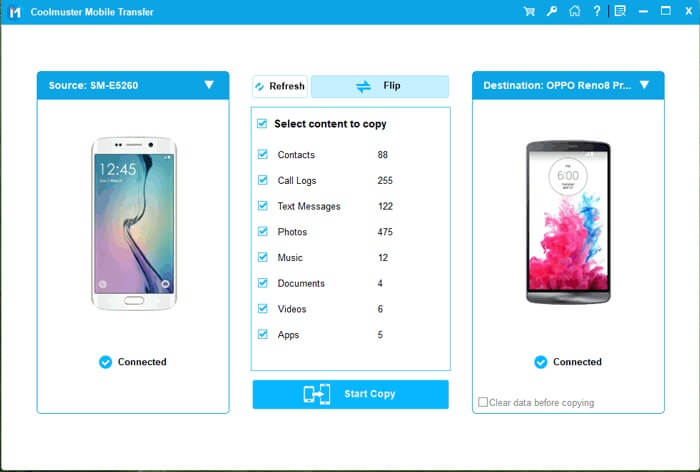
(2) Choose the desired contents for transfer. It supports Contacts, Call Logs, Text Messages, Photos, Music, Documents, Videos and apps. If needed, you can check "Clear data before copying" option to clear data on the Destination device. Then please click "Start Copy" button to start the transferring process.
2. Transfer from iOS to iOS
(1) When two iOS devices have been successfully connected to the program with above methods, you might get an interface as below.
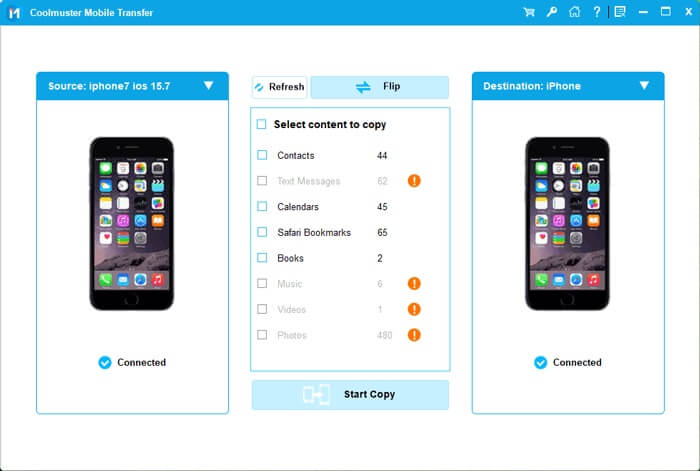
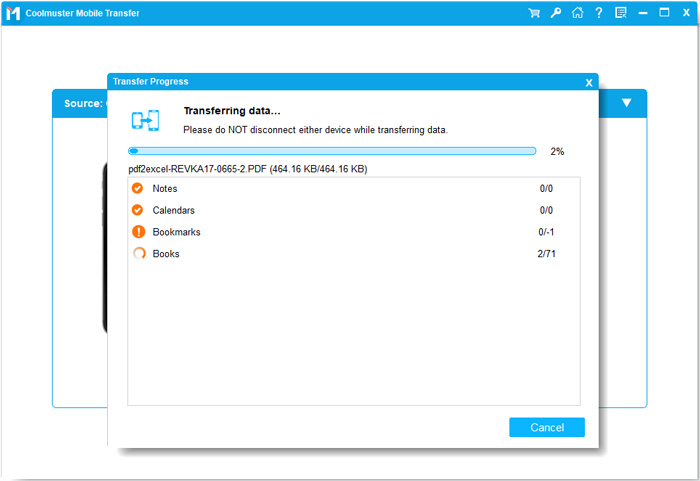
(2) Tick off the desired contents from the content list for transferring. It supports Contacts, Notes, Calendars, Bookmarks and Books. After that, simply click "Start Copy" button to begin the transferring process automatically.
3. Transfer from iOS to Android
(1) When both iDevice and Android device are successfully connected to the program on computer, you will get an interface as below.
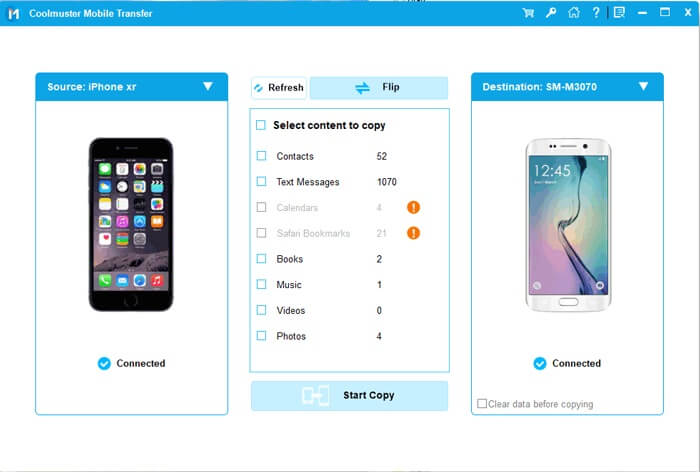
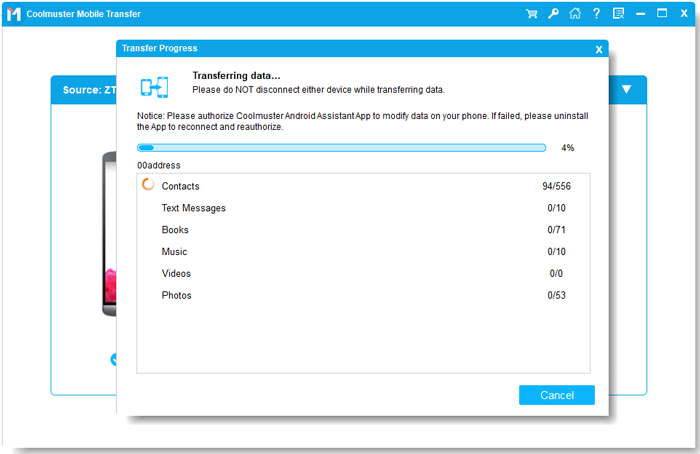
(2) Select wanted contents in middle panel, and Contacts, Text Messages, Books, Music, Videos and Photos are supported. Check "Clear data before copying" option if needed, and hit "Start Copy" button to start transferring.
4. Transfer from Android to iOS
(1) When Android device and iDevice are successfully connected to the program, you will see the interface as follows.
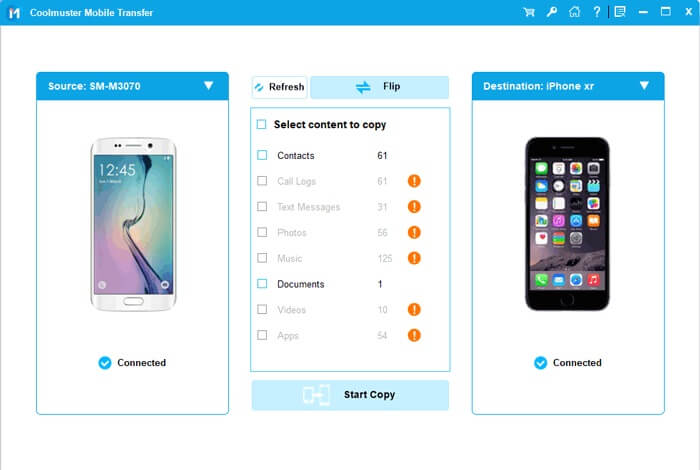
(2) Check the contents you want to transfer. The program supports Contacts and Documents. Then click "Start Copy" button to start transfer data from Android to iOS device immediately.
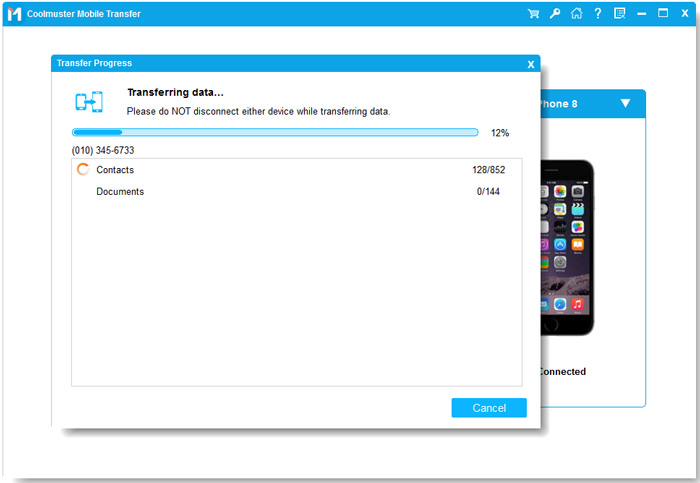
When the whole transferring process is finished after a while, the program will remind you that "Transfer is completed" and offer you the result report about this data transfer.
