Coolmuster Android Assistant Online Help
Below is the comprehensive guide telling you how to use Coolmuster Android Assistant to transfer everything between your phone and computer, manage contacts, messages, call logs, as well as application on computer directly.
Part 1: Preparation - Connect Android Device to Computer
Part 2: Transfer and Manage Your Android Phone Data
Part 3: Back Up and Restore Android Data with 1 Click
Preparation - Connect Android Device to Computer
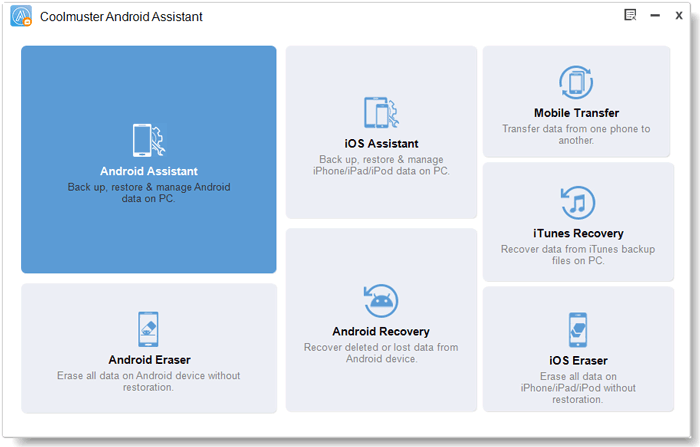
After installing and launching the software, you might see the following toolbox at first. Please enter "Android Assistant" module to access Coolmuster Android Assistant.
To have your Android phone recognized by the program, you can connect via USB cable or Wi-Fi network.
- Connect Android to Computer via USB Cable
Quick look: Connect Android to computer via USB > enable USB debugging on Android > install driver > allow USB debugging on Android > install Android Assistant (Android Version) > Android is connected.
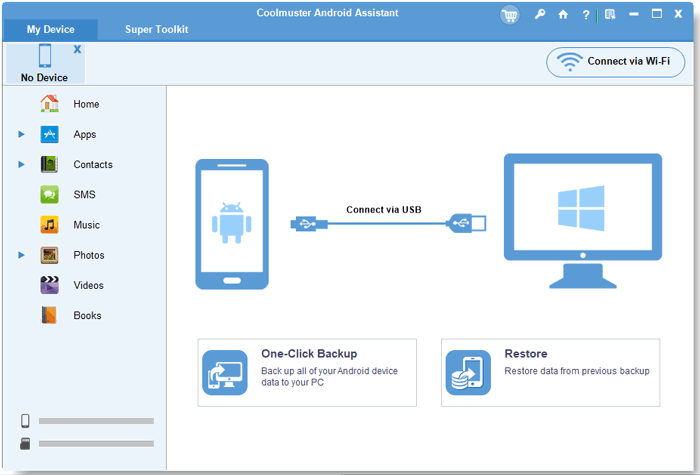
1. When you access Coolmuster Android Assistant, you might see the interface below. Please make sure your Android phone is connected to computer with a USB cable successfully.
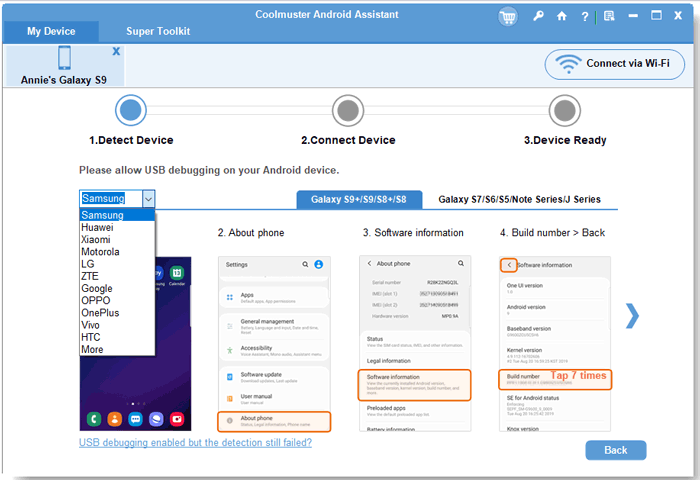
2. The program starts to detect whether the USB Debugging is enabled on the connected Android phone. If not, please enable USB debugging on your Android phone with the onscreen prompt.
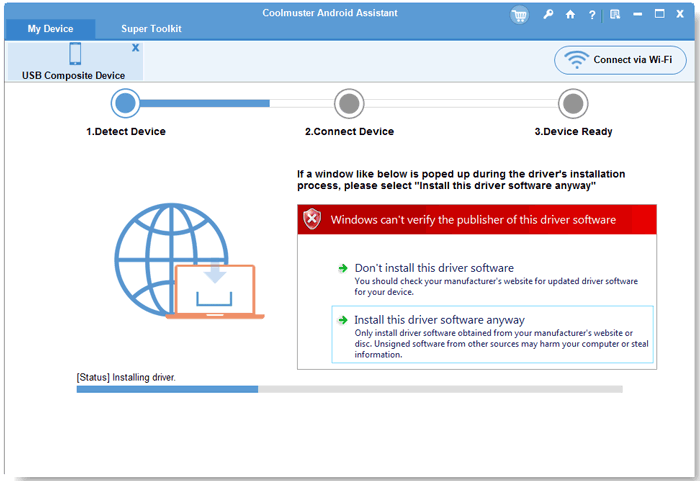
3. Once the USB debugging is enabled, the program will start to detect whether the driver has been installed on your computer. If yes, please skip to the next step; if not, the program will automatically download and install driver into the PC for your device. Failed to install driver?
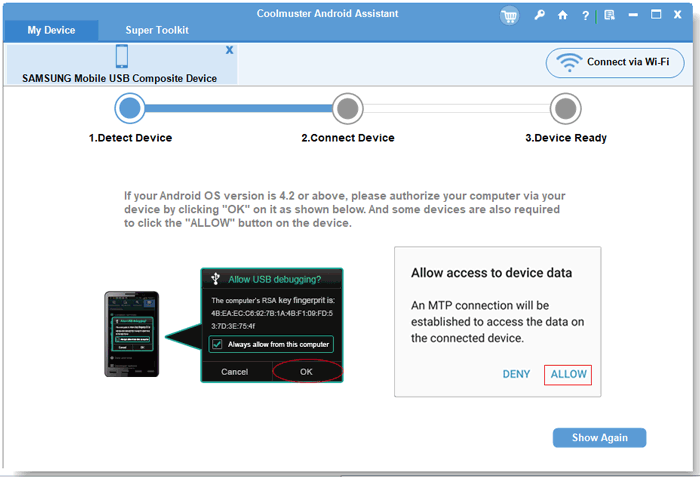
4. If you are running Android 4.2 or above, the program will show the following interface. Please tap "ALLOW" option on your device to access your phone data. (Tip: Click "Show Again" option to pop up the authorization window again.)
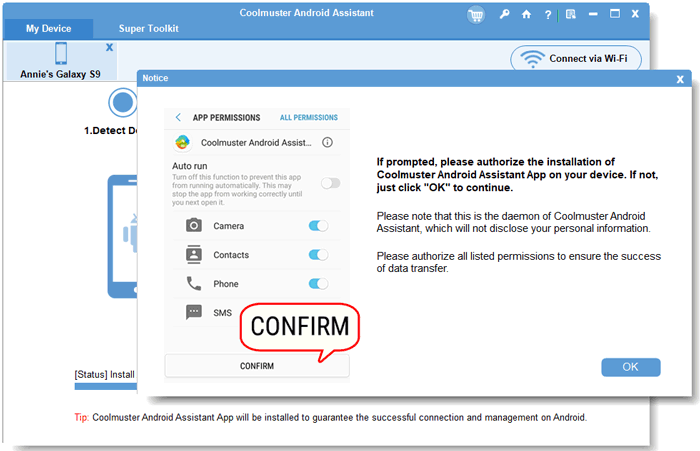
5. The program starts to install Coolmuster Android Assistant (Android Version) on your device to establish the connection. If prompted, please authorize all listed permissions on your device and confirm it to ensure successful data transfer. If not, just click "OK" to continue.
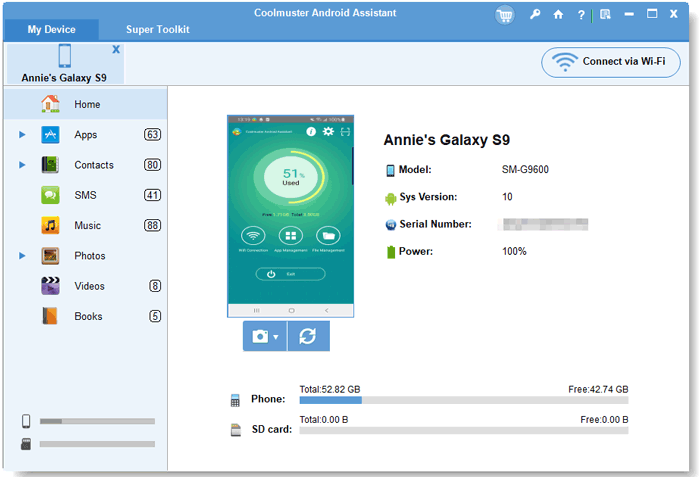
6. When the installation of Coolmuster Android Assistant (Android Version) is complete, the program will be able to successfully recognize your Android phone and show the main interface as below. Now, you can start to effectively manage your Android data with the program. Failed to connect Android with USB cable?
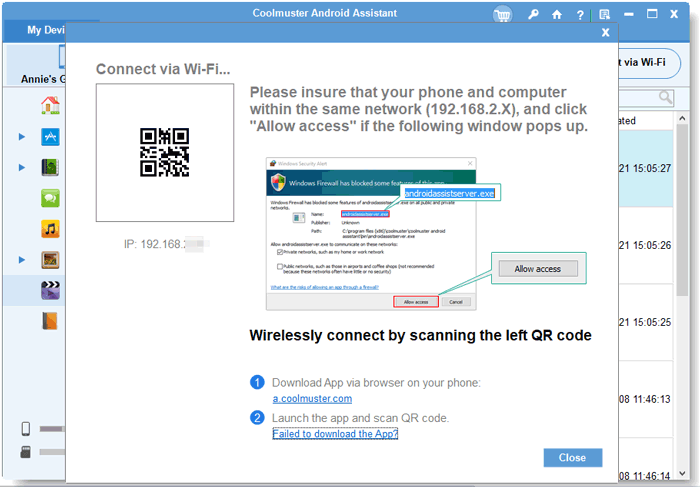
- Connect Android Devices to PC with Wi-Fi
Quick look: After you launch the program, please click "Connect via WIFI" > download and install Coolmuster Android Assistant (Android Version) > launch the Android Version and scan the QR code > successfully connected. See the detailed steps >>
Tip: Failed to connect Android via Wi-Fi? Check here >>
Transfer and Manage Android Phone Data
1. Back Up Android Data on PC
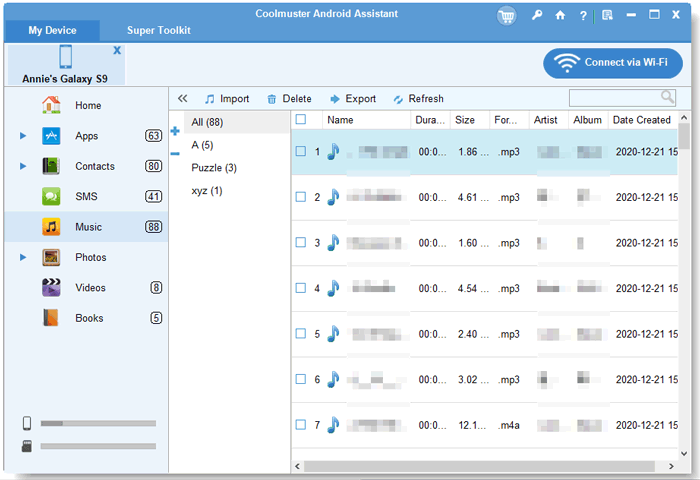
To back up data from your device to computer, you can first choose the items you want to back up. We set "Music" as an example. You should click to choose the "Music" icon from the left menu and you will see all music and ringtones in your phone are listed in the main interface. Check the music files you want to back up and then click the button of "Export" to transfer them to your computer.
2. Import files from PC to your Android device
To import data from computer to your phone, you can click the "Import" button to bring out a file browser window. Choose the contents you want to restore and simply click "Import" to complete the process.
3. How to Import/Export/Delete/Download Media
Simply click on either "Photos", "Music" or "Videos" in the left menu, then click the "add", "export“, "delete" button above these files. You can directly import media files from computer to device, transfer files from Android device to computer, or you can remove them easily with one click.

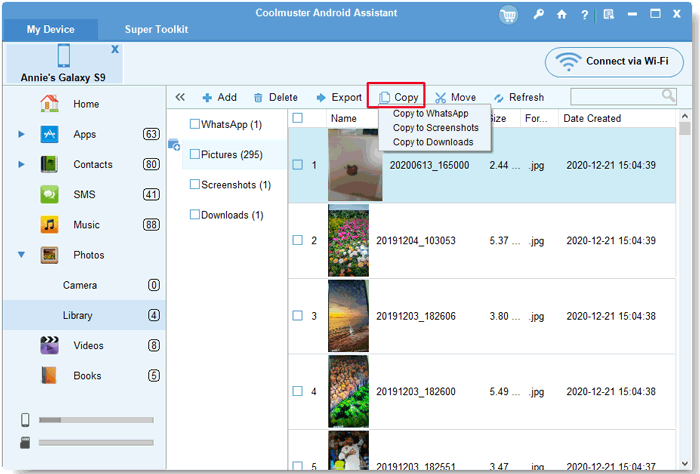
Under the category of "Photos", you can also choose "Library" to manage albums on your Android phone. For example, you can click "+" icon to add albums and click "-" icon to delete albums. You can even copy photos from one album to another by tapping on the "Copy" button.
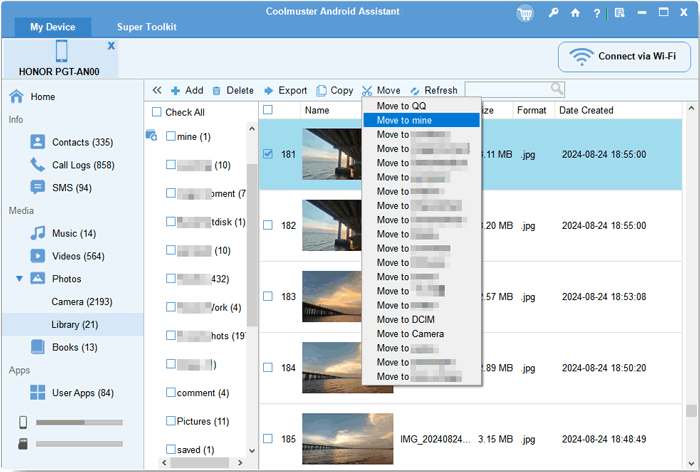
You can cut and paste photos from one album to another by tapping on the "Move" button.
Videos:

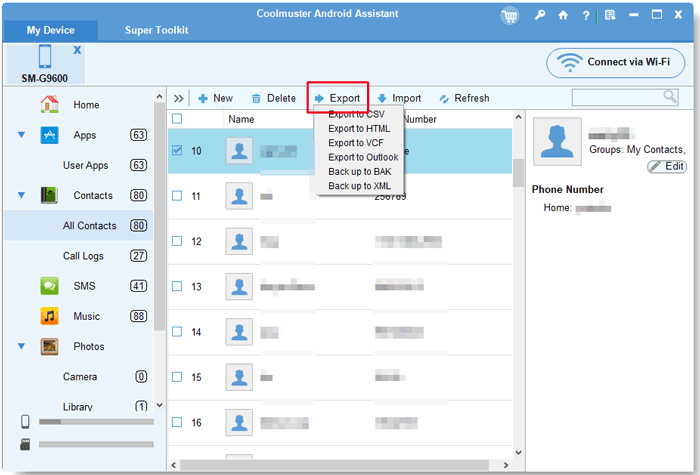
4. How to Add/Delete/Modify Contacts
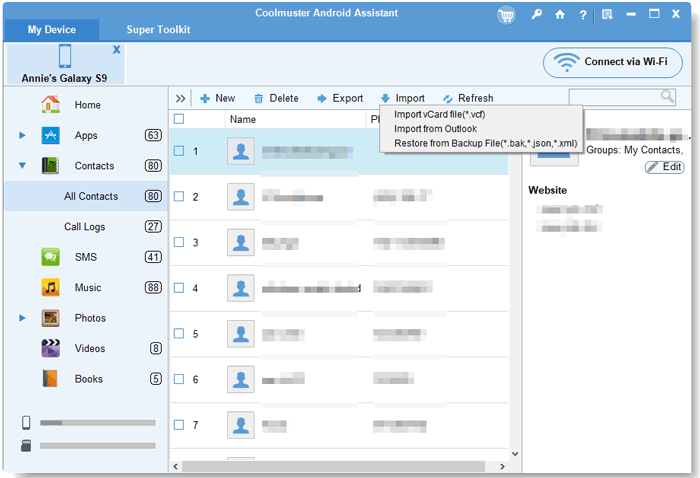
Choose the "Contacts" icon from the left side-bar, click the button of "New" to add new contact, "Delete" to delete unwanted contacts, "Edit" to modify existing contacts. You can edit name, email, phone number, website, address, middle name,etc.
You can export contacts to CSV, HTML, VCF, Outlook, BAK and XML files; import contacts from vCard file, Outlook and backup file (.bak, .json and .xml).
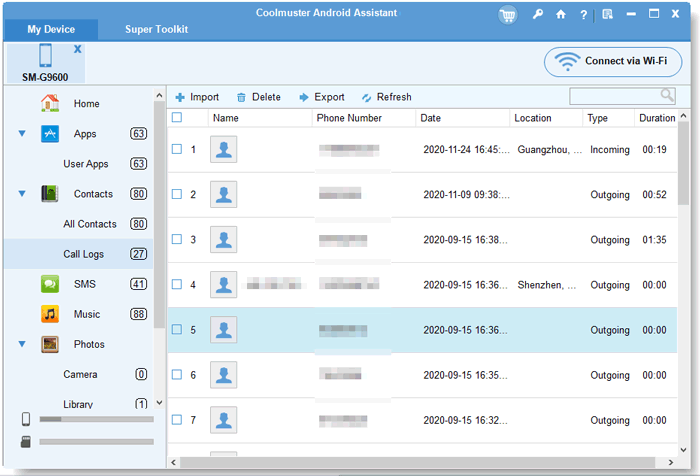
5. How to Back Up, Import and Delete Call Logs
You must be noticed the "Call Logs" category is folded in the "Contacts" tab. Just click "Contacts" > "Call Logs", all outgoing and ingoing call logs on your Android phone will be scanned out here.
You can import call logs from computer to your Android, delete useless call history from your Android and back up call logs from Android to computer by clicking on the "Import", "Delete" and "Export" options from the top menu.
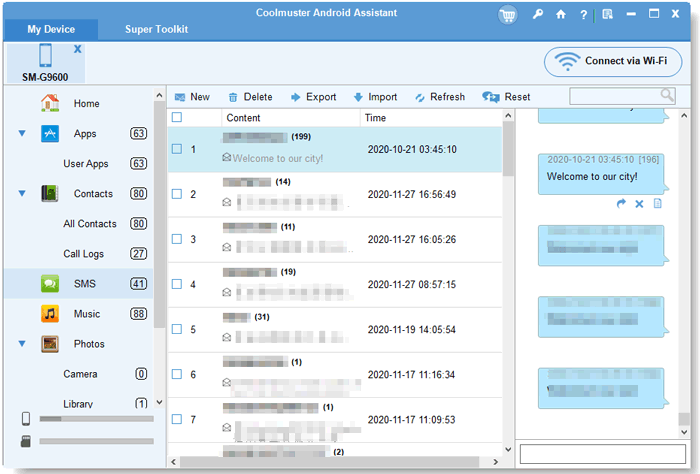
6. How to Export/Import/Send Messages
Choose the "SMS" option from the left panel. All the text messages in your phone will be shown on the right. Here you can choose "Export" or "Import" button to transfer all the SMS between Android and computer; click "Delete" option to remove needless messages from Android.

The latest version of Android Assistant can also allow you to resend, forward and copy text messages on computer directly. You can do these operations on the right side SMS dialog list.
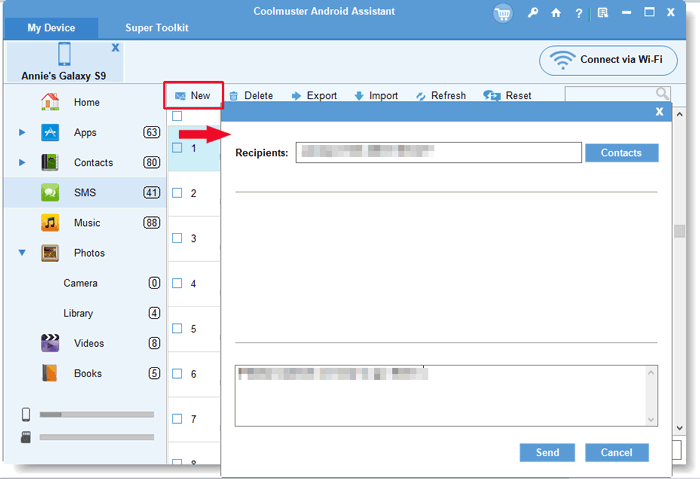
To send text messages from computer to phone, you can click the "New" button to bring out the "New Messages" dialog box. Type the phone number to which you want to send the message, or directly click "Contacts" nearby to choose the phone number from your contact list, and then input the characters in the blank area. After that, click "Send" to send the text message.
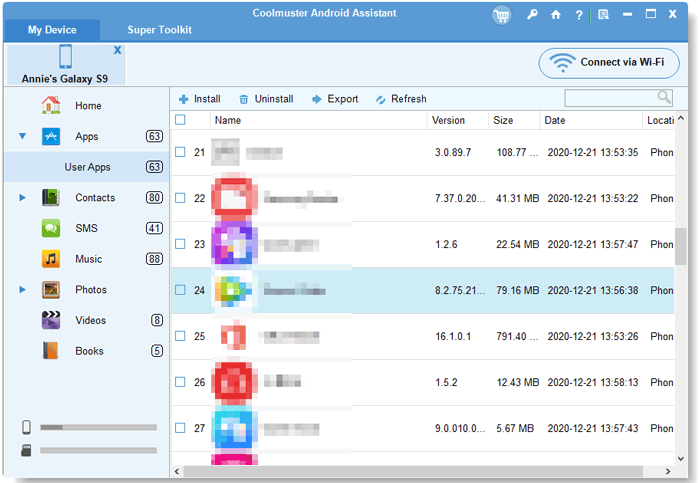
7. How to Manage Your Apps
Choose the "App" icon from the left-side menu and all the applications installed on your phone will be displayed. You are allowed to install, uninstall, export Apps freely with this software.
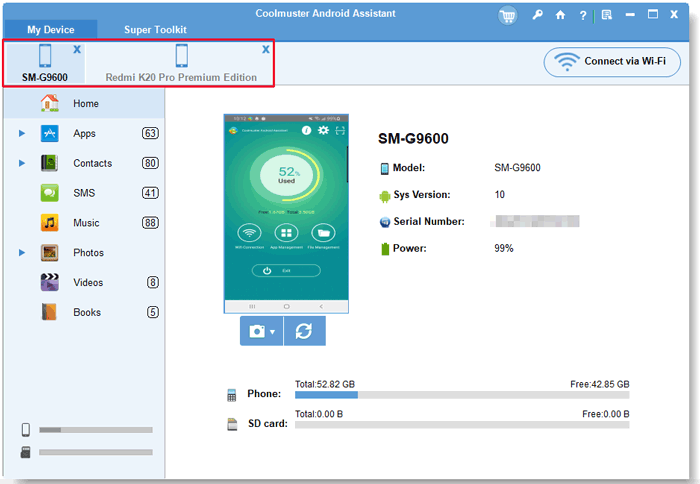
8. Manage Multiple Android Devices Simultaneously
Android Assistant enables you to manage multiple Android devices simultaneously. You can connect more than one Android device to the program and once connected successfully, they will be displayed on the top menu bar, just like the following picture shows. Now, you're enabled to manage them at the same time.
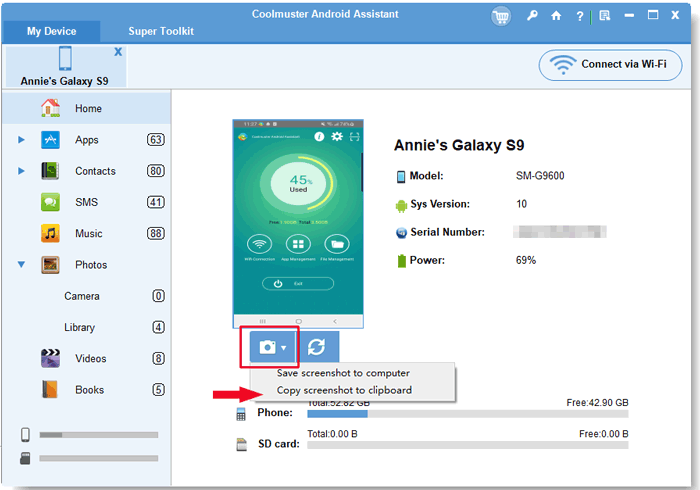
9. Take Screenshot of Your Phone (USB connection only)
On the home screen of the program, you can click the camera-liked icon to take screenshot of your phone. After that, you can choose to "Save screenshot to file" or "Copy screenshot to clipboard".
Back Up and Restore Android Data with 1 Click
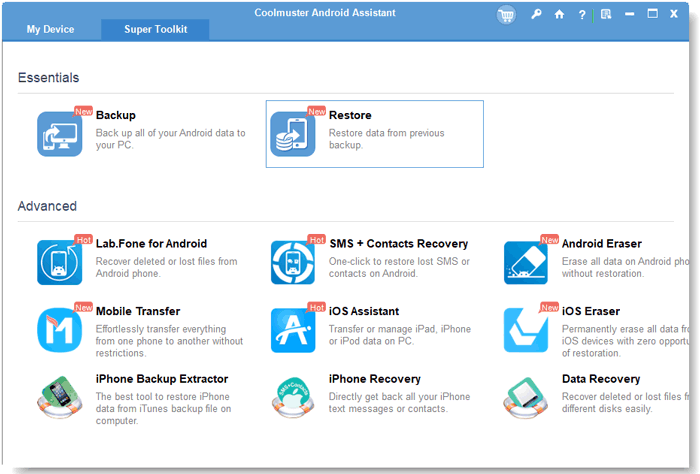
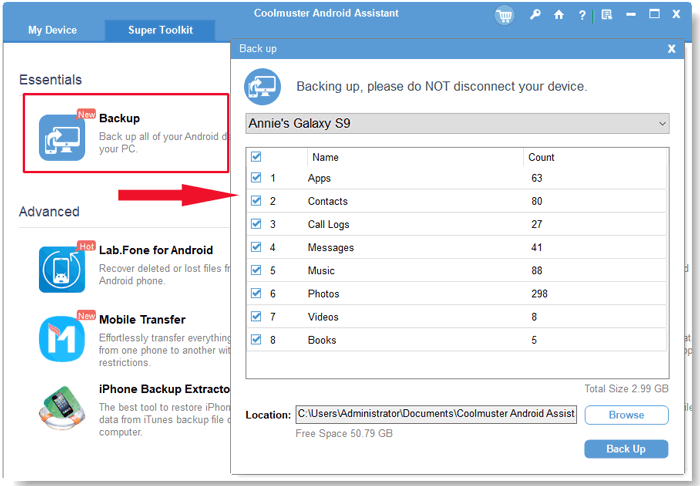
If you want to back up the whole Android to the computer but don't like to export them one by one, Android Assistant provides you with its new 1-Click Backup & Restore feature. It allows you to back up all your data from Android to computer with 1 simple click. And also enables you to restore these backup files to any Android devices with 1 click. To achieve it, you only need to go to "Super Toolkit" and choose the option of "Backup" or "Restore". Then you'll see an interface like below:
1-Click Backup
Select the contents you want to back up and choose an output location on your PC to save these backups. Then click on "Back Up" button to save them to the destination.
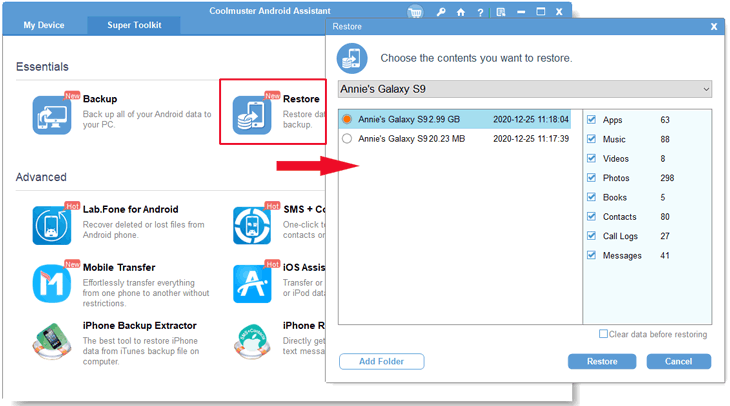
1-Click Restore
Choose the backup record you need and select the file types you wish to restore, then click on "Restore" button to start restoring your selected files to the linked Android device.
Video Tutorial
