Coolmuster Android Eraser Online Help
Coolmuster Android Eraser allows you to erase all data on Android device with 1 click. After erasing, all files will be completely and permanently wiped, leaving no opportunity to restore the files from your device even with third-party recovery tool. Now, you can check the step-by-step guide to use Coolmuster Android Eraser.
Part 1. Make Your Device Recognized by the Program
Part 2. Erase All Data on Android Device with 1-Click
Part 1. Make Your Android Device Recognized by the Program
Before using Coolmuster Android Eraser to erase your Android phone, please get your Android device detected by the program at first. You have 2 ways to connect Android phone to computer, either connecting via USB or connecting via Wi-Fi.
Once you launch the Android Eraser but have not connected to your device, you will see its primary interface as below.
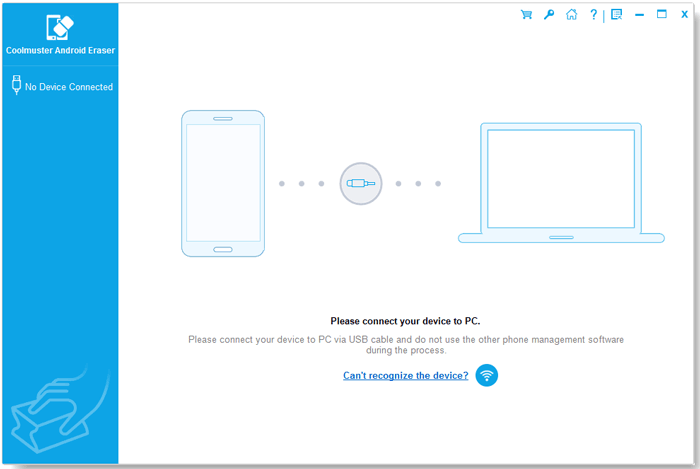
- Connect Android to Computer via USB Cable
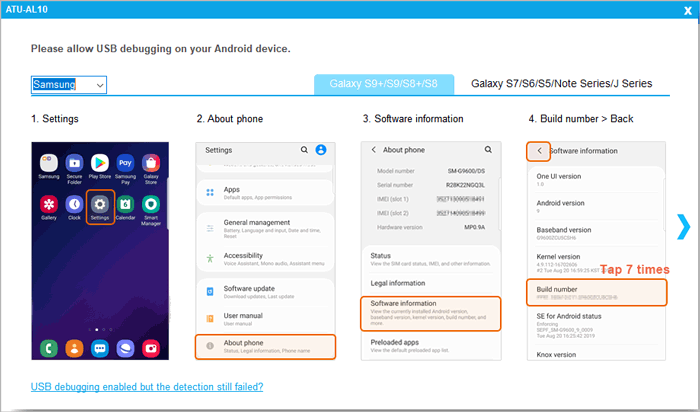
(1) Launch the program and ensure your Android phone is connected to computer properly with a USB cable. If you have not opened USB debugging on your device, please enable USB debugging on your Android phone with the onscreen prompts according to your Android OS version or get a faster way to allow USB debugging on your Android phone here.
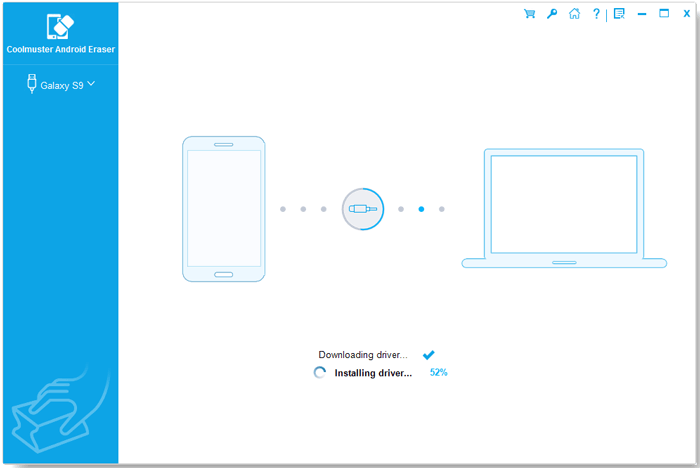
(2) Then the program will begin to initialize your device and install driver for your device automatically.
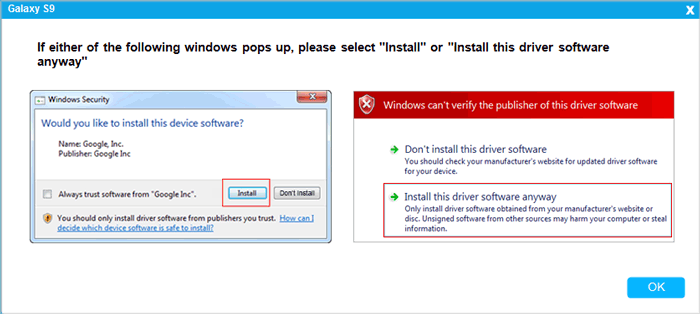
(3) As prompted, if either of the following prompts pops up, please click "Install" or "Install this driver software anyway" to have the driver for your device successfully installed.
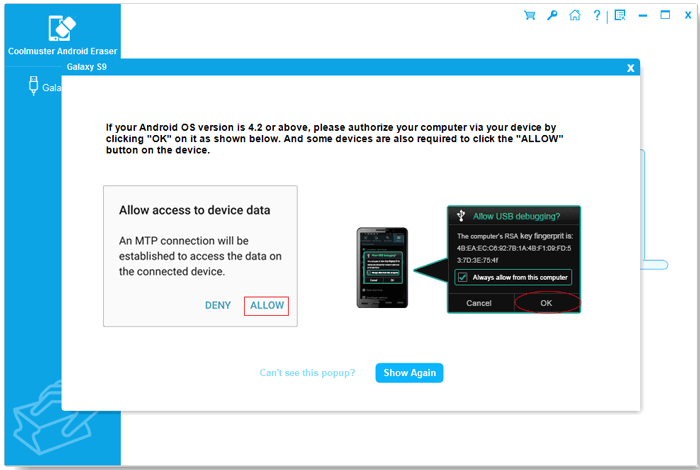
(4) For Android 4.2 or above, please authorize the computer to access your device data by tapping "ALLOW" or "OK" on your device as prompted. If you can't see this popup, please hit "Show Again" button on the program.
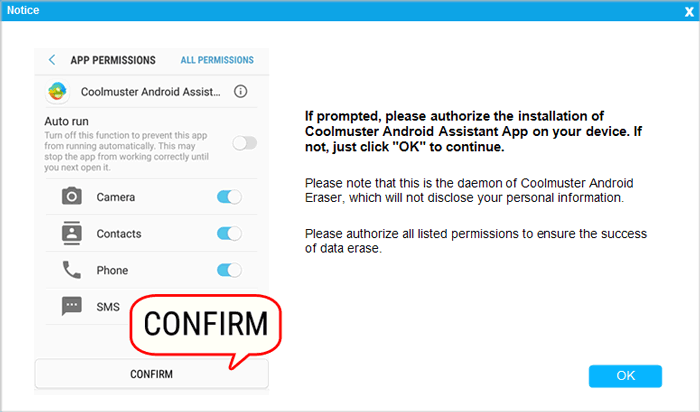
(5) Then the Coolmuster Android Assistant App will be installed automatically on your device to establish the connection. If prompted, please authorize all listed permissions on your phone and tap "Confirm". If not, just click "OK" to continue.
After that, the program will successfully recognize your Android device and show the basic info of your device. Now you can start to erase data on your Android phone.
- Connect Android to Computer via Wi-Fi
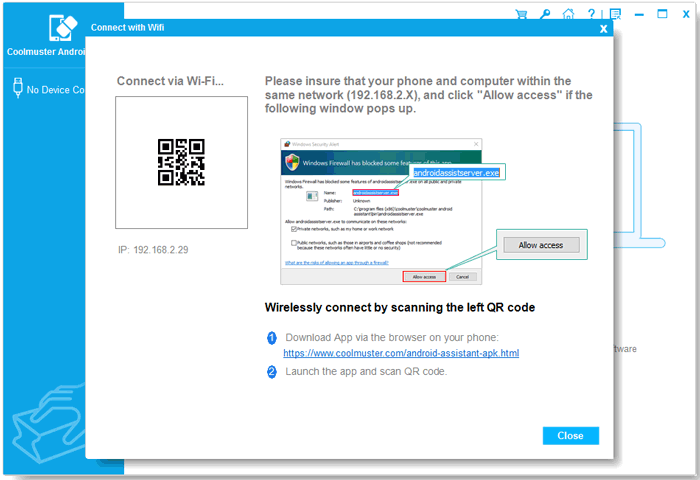
Launch the program > click the Wi-Fi icon ![]() > download and install Coolmuster Android Assistant (Android Version) > open the Android Version and scan the QR code > connected successfully. Check detailed steps here >>
> download and install Coolmuster Android Assistant (Android Version) > open the Android Version and scan the QR code > connected successfully. Check detailed steps here >>
Still failed to connect? Please check what to do if the program does not recognize your Android device.
Part 2. Erase All Data on Android with 1-Click
Notes:
a. Before erasing Android data, please remember to back up your important data if needed since the erasure is unrecoverable.
b. Please do NOT disconnect your device until the whole erasing process is finished.
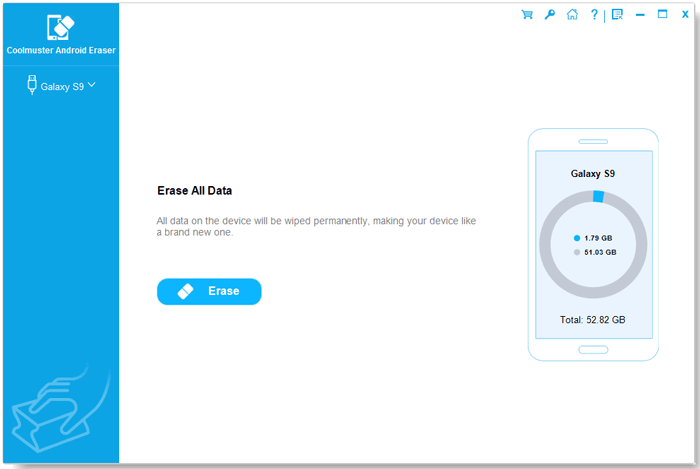
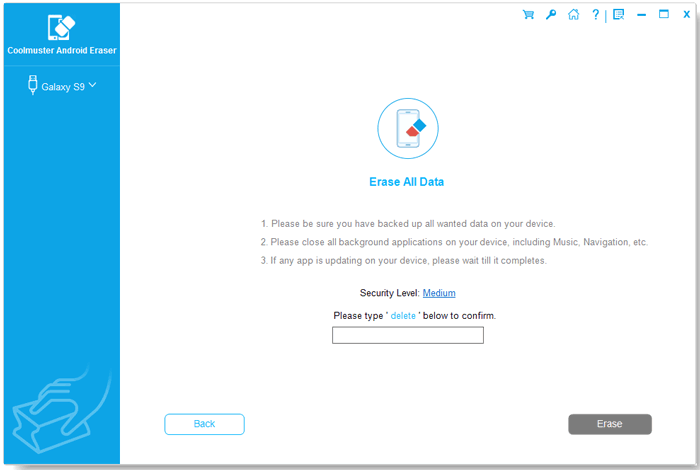
Step 1. Click "Erase" button to get started.
When your Android phone is connected successfully, you might see the interface as below. Pleas click "Erase" button to get started.
Step 2. Choose security level for erasing and confirm it.
(1) Click the menu beside Security Level to choose security level for erasing.
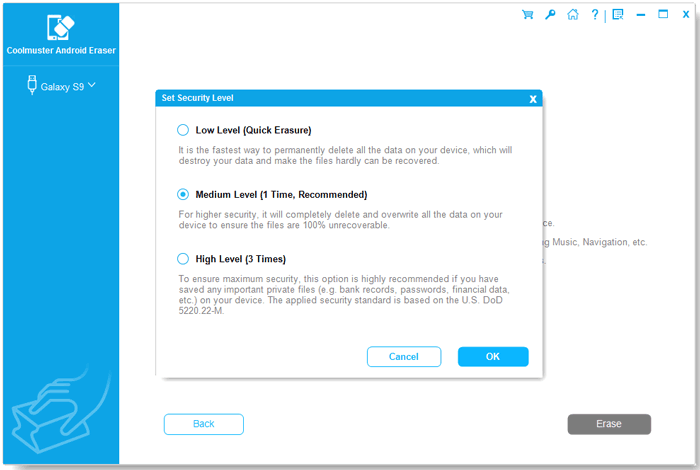
(2) Now, please choose the desired security level: Low Level, Medium Level and High Level. After selection, please click "OK" option to move on.
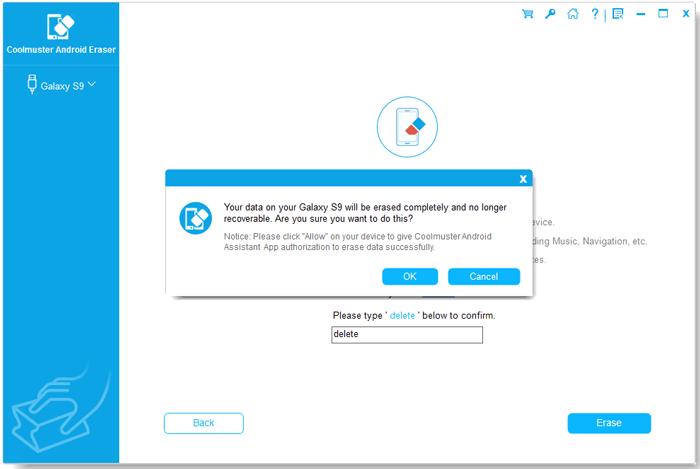
(3) Type "delete" into the blank to confirm your choice and click "Erase" button. Then a prompt will pop up to ask you whether you are sure to completely erased your phone data, just click "OK" button to start the erasing process.
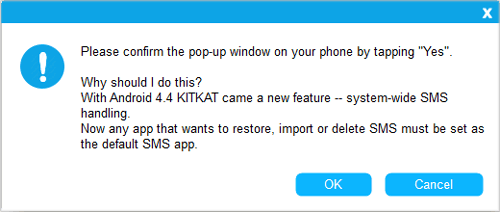
(4) When the following prompt pops up, please tap "Yes" on your phone to successfully delete SMS on your Android phone.
Step 3. Start to erase Android data.
(1) After confirming your choice, the program will conduct a quick and deep scanning on your Android phone to access your Android files.
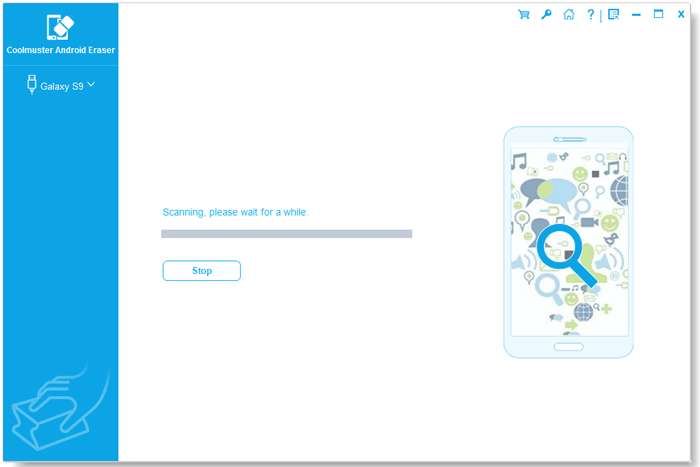
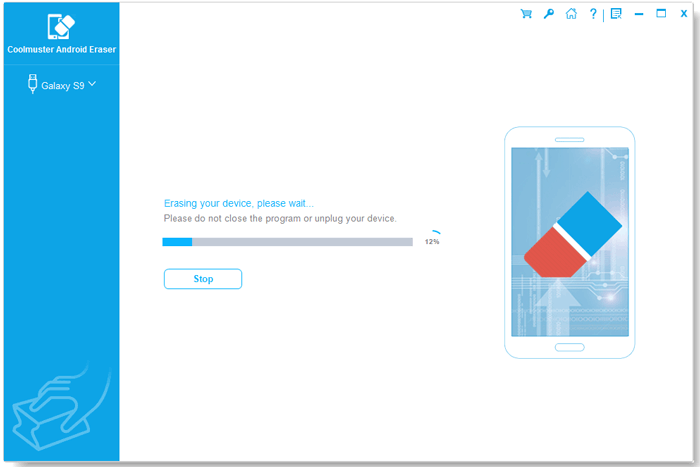
(2) After quick scanning, the program will start to erase your device data immediately. Please wait for a while.
(3) After erasing, the program will continue to overwrite your phone data immediately.
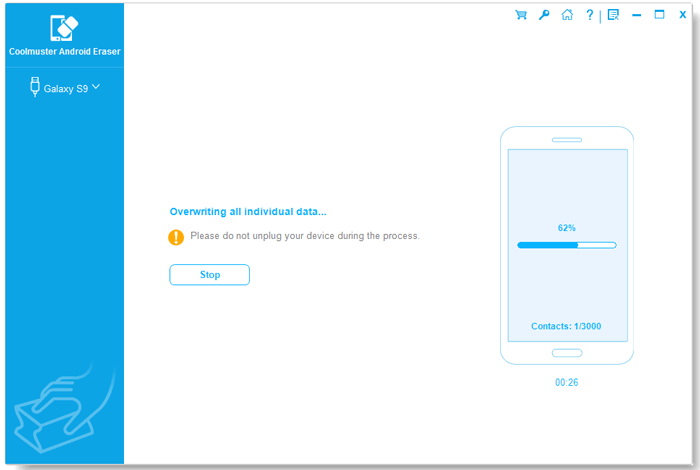
Note: Low Level is the fastest way to erase data on Android. This is because the program overwrites your device data 3 times to ensure maximum security in High Level, while it overwrites your device data 1 time in Low Level and Medium Level.
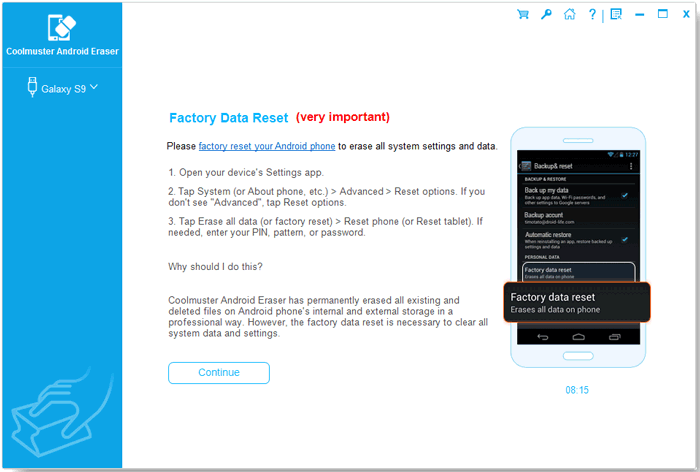
Step 4. Factory reset your Android phone from the Settings menu.
After erasing or overwriting your Android data, it is recommended to factory reset your Android phone to completely erase all system settings and data.
Notes: If this prompt pops up, please tap "Yes" option on your phone to set the default SMS app back.

Now, please factory reset your Android phone from Settings and then click "Continue" button.
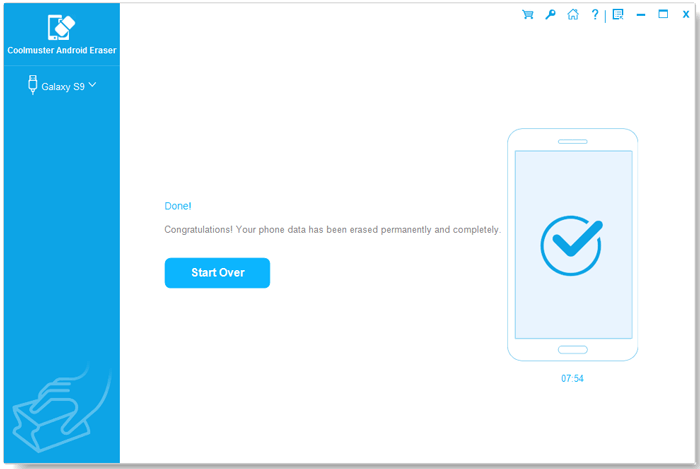
When the whole process is complete, all of your Android phone data will be erased completely and permanently, leaving zero chance to be recovered, and you can start to set up your Android device now.
Video Tutorial
