There is a ton of data on your Android mobile phone and Android tablet and you have strong responsibility to protect the data from losing from the Android device. Although part of the data is automatically synced to your Google account for backup, but there are still some files that require you to backup manually. However, many Android users have to get their Android devices rooted before they can backup the device. What if you haven't rooted or don't want to root the Android? Rooting Android device is complex especially for those people who are not familiar with the rooting process.
Now, Android users can backup Android phone/tablet with the Windows or Mac computer without the root permission. There is another mean to help you keep up to date backup for your Android. All what you need is the Coolmuster Android Assistant with its Mac version Coolmuster Android Assistant for Mac, which enables you to save everything on your Android to Windows PC and Mac OS X without root. You can see where this frees up space on your Android and avoids the clutter you may be experiencing right now with your handheld. If you have trouble finding a particular app either on the handheld to run or one you heard about on the web and want to try for yourself.
Once you keep a backup of your Android (Samsung, HTC, LG, Huawei, ZTE, Sony, etc.) on computer by using the Android Assistant, you can even retrieve deleted Contacts as well because all the backup file can be restored to your Android with ease. Now you have a full service assistant that will help keep your Android Handheld up to date and well organized.
Step 1. Get your Android device connected to PC/Mac
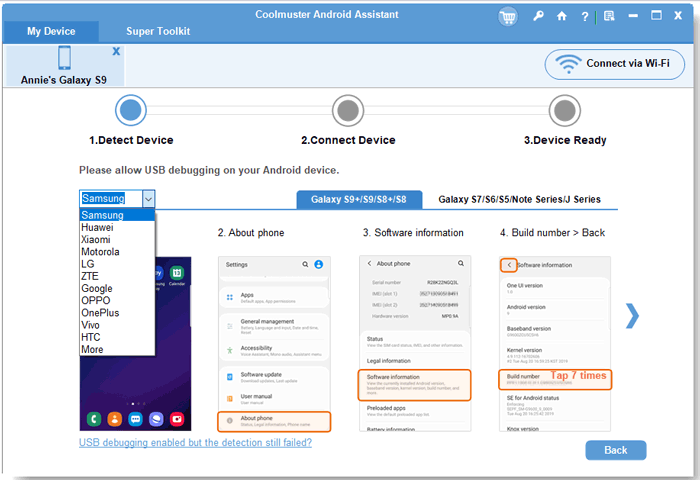
After you download and install the recommended Android backup app - Coolmuster Android Assistant, launch it and then get your Android phone or Android tablet connected to the same computer with a USB cord. To make the Android device detectable by the Android Assistant, you may need to enable USB debugging on your device first. If you have already set it, you can skip to the next step.

Follow the below instruction to enable USB debugging:
1) For Android 2.3 or earlier: Enter "Settings" < Click "Applications" < Click "Development" < Check "USB debugging".
2) For Android 3.0 to 4.1: Enter "Settings" < Click "Developer options" < Check "USB debugging".
3) For Android 4.2 or newer: Enter "Settings" < Click "About Phone" < Tap "Build number" for several times until getting a note "You are under developer mode" < Back to "Settings" < Click "Developer options" < Check "USB debugging".
When the USB debugging is enabled, click "Allow" on your phone to allow the program super user authorization when an Superuser Request pops up.

Step 2: Preview the scanned out Android phone data
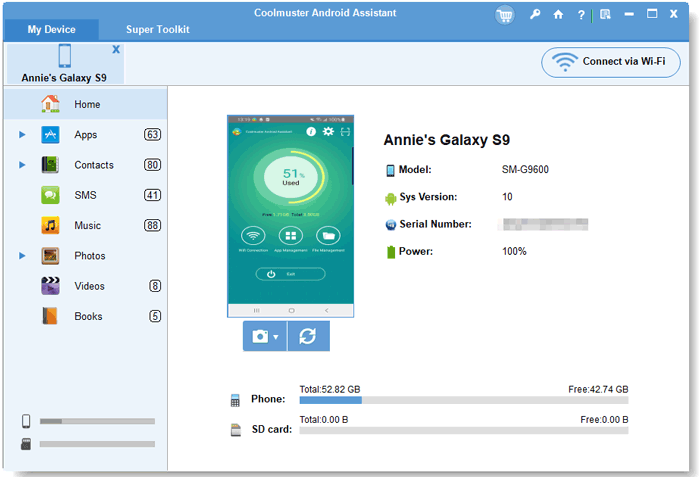
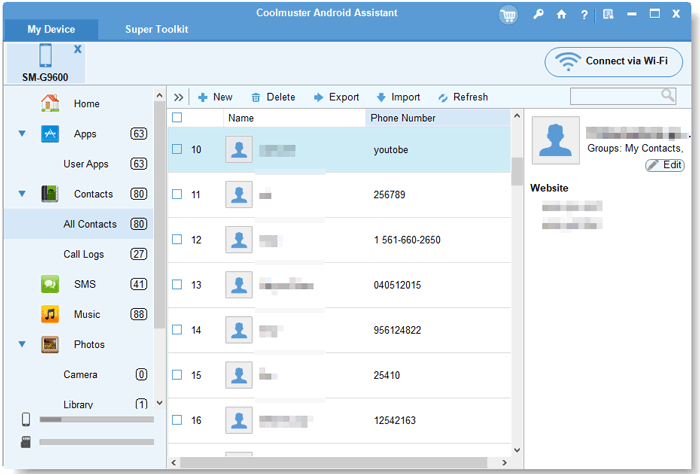
Your Android device will be detected by the program and all your Android data, such as Music, Videos, Photos, Contacts, Apps, Books, etc. will be scanned at the same time. They will show up in the upper window, allowing you to check them one by one in details. Just choose each category and preview the contained files in the below.

Step 3. Backup Android data without rooting
Feel free to select the files you want to backup on your computer, mark them and then click the button of "Export" to start the Android data backup process without rooting the device. The versatile Android data backup tool allows you to customize an output folder to save the exported Android data.
Related Articles:


