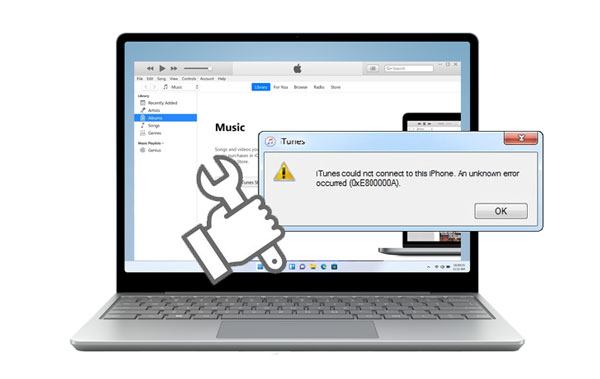
If you always use iTunes, you're well conversant with the 0xE80000A error on iTunes. This error occurs when you are connecting an iPhone to the computer while trying to access iTunes. Sometimes, the error comes when iTunes doesn't connect to the iPhone successfully with a message stating,
"iTunes couldn't connect to iphone 0xe80000A." This means that you won't be able to back up your data or do any operation in your iTunes. Frustrating right? It can indeed demoralize you, but the good news is that there are tricks to sort out the 0xe80000A error on iTunes.
So, if your computer is greeted with error oxe800000A, fret not. Read this guide to help you resolve the problem in the easiest ways possible.
0xe80000A is an iTunes error that shows up when connecting iPhone device to a Windows computer.
Even though the error iTunes 0xe80000A in iTunes is uncommon, knowing the reason behind its occurrence can help you prevent it from happening the next time. Besides, knowing the cause can give you a hit on how to fix it. The causes vary in different aspects, and some of them are as follows:
* iTunes isn't installed completely.
* USB port or cable is damaged or incompatible.
* iTunes isn't the latest version.
* Your iOS device is locked.
* Something is wrong with the PC.
* System background processes.
These are the most common causes of iTunes-related errors, and if you are struggling with the error, we've highlighted different solutions to help.
Now let's look at the simple fixes to the "iTunes could not connect to this iPhone 0xe80000A" error.
You are likely facing this problem because of software incompatibility. Therefore, updating the software of all platforms and devices you are using should be your number one option. The latest software versions are meant to fix bugs and any other system-related problems, including error 0xe80000A. Here are steps to update your devices and platforms:
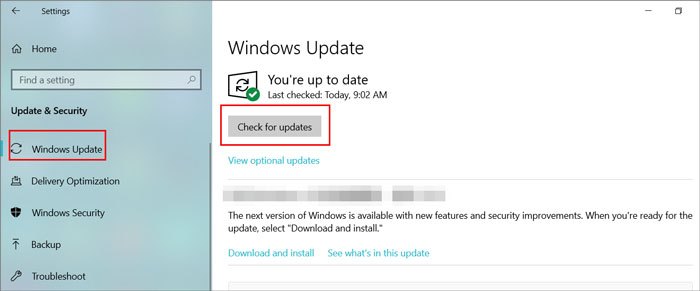
Updating the Windows computer
Step 1: Head to Settings of your computer by opening the control panel and looking for the "Settings" option.
Step 2: Then proceed to "Windows Update" > "Check for updates".
Step 3: If any update is available, update them to the computer.
Updating the iOS device
Now update the phone you are using by:
Step 1: Heading to the Settings page and click on the "General" option.
Step 2: From there, choose "Software Update".
Step 3: If there's any update, press the "Download & Install" button to download the update.

You might need: Fix iPhone Clicking on Its Own in 11 Practical Ways
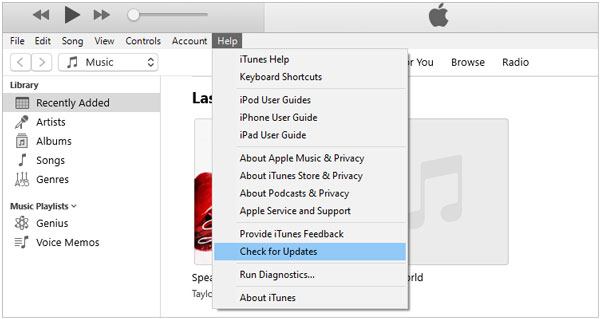
Updating iTunes
It's also ideal to update the iTunes application on a Windows computer. Updating the iTunes app is quite easy; just launch iTunes, and click the "Help" option. Then choose "Check for Updates". If an update is available, install the app and reboot the PC.
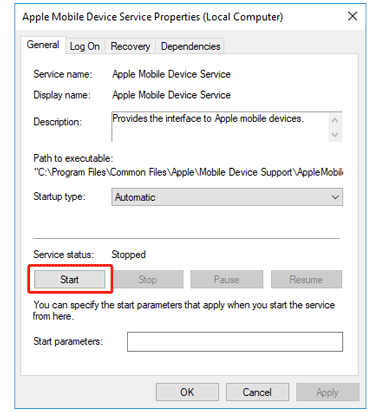
Another fix that has been seen working for iOS-Windows-based connectivity problems is rebooting the Apple iOS Device Services. It's surely an effective solution that can help fix the unknown iTunes error. Below are steps to reboot Apple Mobile Services on a Windows computer:
Step 1: Access the Run command window on the PC by pressing the Win+R keys. Once you see the window, type in services.msc, and tap the "Enter" option.
Step 2: Look for the "AppleChargerSrv" option in the services list. Click on this option and choose "Properties", and ensure you set to "Automatic" and hit the "Start" button.
Step 3: Lastly, hit the "OK" button and save the changes.
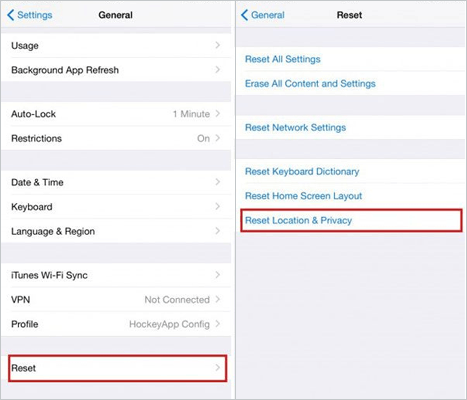
"iTunes cannot connect to iPhone" error can also result from Corrupted Privacy and Location settings. This is because these settings caries trust permissions given to an iPhone when connecting it to PC. So, resetting the Privacy and Location settings might be a great fix. Here are steps to reset Privacy and Location Settings on the iOS device:
Step 1: Navigate to Settings on an iOS phone. Look for the "General" option, tap on it, and proceed to "Reset".
Step 2: Now, click on "Reset Locations & Privacy". You will then get the Reset confirmation; just confirm by clicking on it. You have now finished the process of resetting the Location and Privacy.
Guess you need: What if your Touch ID is not working on your iPhone? If so, you can fix it with these tricks.
Lockdown folder is iTunes exclusive folder made by iTunes on Windows computers. This folder contains several security certificates used to authenticate connections between iOS devices and PC.
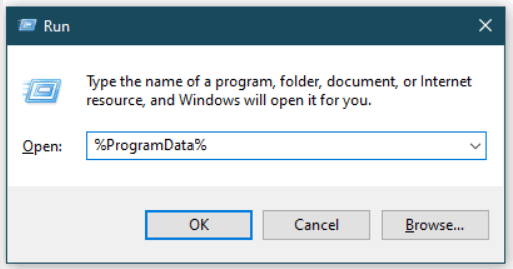
Therefore, you should also try your luck by resetting lockdown folder, which can help resolve the "error iTunes 0xe80000A". Follow these steps to reset the lockdown folder:
Step 1: Open Run Windows by pressing the Window + R keys, then enter "%ProgramData%" in the box and tap "OK".
Step 2: Head to the "Apple" folder and proceed to the folder named "Lockdown". Don't open the folder; just rename it to something you can remember, like Lockdown.old.
Step 3: Now relaunch iTunes on the computer and reconnect the iOS device. Make sure you click "Trust" as prompted. Doing this will create a new folder, thus restarting the security certificates.
If you've tried all the basic troubleshooting steps and your iTunes error code 0xE80000A stubbornly persists, it's time to take a closer look at the hardware. Changing the USB ports and cable can usually do the trick—especially if they are older or have been used more often.
Before buying new cables, check what you already have in your home and see if it might do the job. Did your friend just get a new phone with an extra cable? See if they're willing to part with it for a while! You never know—their hardware could be the missing piece of the puzzle that finally fixes your iTunes error.
If you already have a few spare cables, try them out one at a time until you find the working combination. That's often the fastest way to identify which USB port and cable is causing this error.
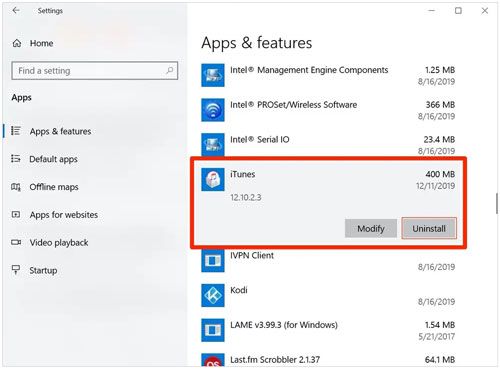
Uninstalling and reinstalling iTunes is one of the quickest and easiest ways to fix this issue. So before you start banging your head against the wall in frustration, just uninstall and reinstall iTunes. It will take only a few minutes, and you'll be back up and running in no time. To do that:
Step 1: Start by right-clicking on the "Start" menu and choosing "Apps & Features".
Step 2: Choose "iTunes" and head to "Uninstall".
Step 3: Go to the Apple site or Microsoft Store and reinstall iTunes.
Learn more: It is also easy to fix the white screen of death on an iOS device. Let's check it out.
If you're having trouble with iTunes, disabling your third-party antivirus software may be the way to go. It may sound counterintuitive but just try your luck. Error 0xE80000A can typically be fixed by just turning off the extra layer of protection that third-party antivirus software provides. It's a simple solution that could save you hours of frustration! You may be surprised at how effective this fix can be!
If iTunes Error 0xE80000A is still plaguing you, don't give up! iTunes Repair has got your back! This is a professional tool that can fix any iTunes errors, including iTunes 0xe80000A errors, iTunes error 9, in a jiffy. Even though iTunes is crashed, it can fix it immediately. It's like a miracle cure for all your iTunes woes.
With just a few clicks, your iTunes will be back up and running in no time. Its powerful suite of features makes it incredibly easy to repair your corrupted files without any additional hassle.
Just download the app and connect your device to your computer. The program will scan for any issues and then repair them swiftly.
* Fix 100+ iTunes errors and problems without effort.
* One-click iTunes error repair.
* No data loss while fixing iTunes issues.
* Support all iTunes versions.
Download this iTunes repair software.
Let's see how you can fix the error 0x800000A with iTunes Repair:
01Install the program on the computer and choose "System Repair".
02Choose the option for "Repair iTunes Connection Issues", and then click the "Start" button to proceed. After the download completes, press "Start" to begin repairing iTunes.
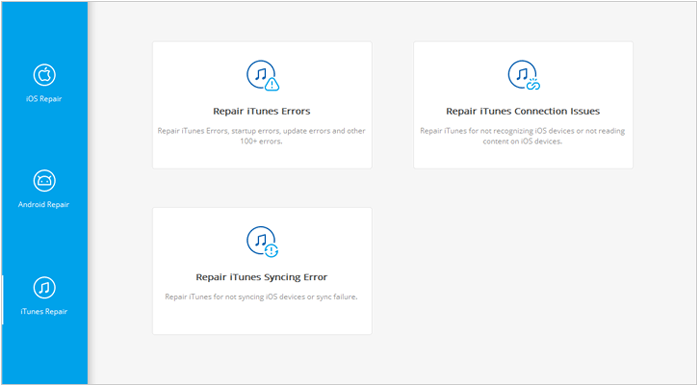
03Wait for the repair process to finish, then click "OK".

Read more: How to Fix iPhone Not Syncing with iTunes [8 Fixes]
Let's face it – no matter how advanced technology gets, the dreaded 0xe80000A error in iTunes can still put a damper on your day. But don't let this pesky bug ruin your entire evening!
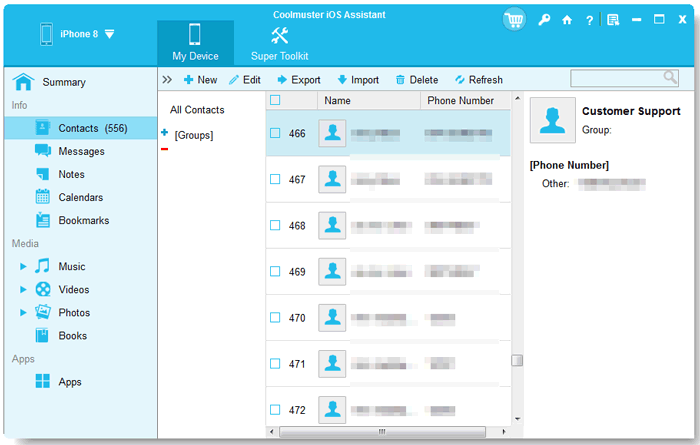
You can now back up your iPhone/iPad/iPod touch data without iTunes. Coolmuster iOS Assistant is the perfect tool for this job, offering a quick and simple way to safeguard your iPhone information. The tool can back up almost all types of data, including photos, videos, music, contacts, etc., safely to your computer.
Check the steps below to back up your iOS data via this program:
Step 1: Install the program on the computer, then launch it to show its primary interface.
Step 2: Connect the device to the computer via a USB cord and click "Trust" as prompted. Wait for the program to recognize the device.
Step 3: You'll see all files available on your device displayed on the screen in the left panel. Open one folder at a time from the left panel. Preview the contents as you select the ones to back up. Once done, press the "Export" button and select the correct format to start the transfer process.
Even though 0xe80000a error iTunes happens rarely, it can be annoying. Hopefully, you'll be able to resolve the problem with the fixes mentioned above. With iTunes Repair at your disposal, you have nothing to worry about. The tool can fix any iTunes error easily and takes no time to get the job done.
Besides, get your data backed up in no time with Coolmuster iOS Assistant – then you will have another option to back up your iOS data even if iTunes is damaged.
Related Articles:
How Do I Stop My iPhone Photos from Syncing to My iPad? (Easy to Solve)
5 Quick Ways to Recover Deleted Text Messages on iPhone without Computer
Complete Guide on How to Transfer PDF to iPhone
How to Transfer Data from iPhone to Laptop? (6 Proven Ways)
[Fixed] iPhone Messages Disappeared But Still Taking up Space
How to Fix Green Lines on iPhone Screen? Proven Solutions Are Here


 Free Download for PC

